Wednesday, April 6, 2016

More color in Weigh Scales

 Well, I have selected my earth color and it is called Camel by Valspar. Here is where we are starting. Some white plaster color and some colored structolite.
 Coming around the middle of the town to the west end.
 Now at the far west end I start to apply my mix of 50/50 water and paint.
 It is a noce warm tan color that will be a base for our addition of ground foam.
 A look down the hillside
You can see the color difference to the colored structolite just above the center paper towel.
 Now the east end is more consistent and warmer.
 Here is the long view.
 I also had to paint the track. I used a mix of Rustoleum Camouflage Brown and a flat brown spray. I found the Camo brown a bit dark and wanted to lighten things a bit.
 An overhead view. the track looks more consistent and smaller once it is painted. Now I have to be sure the paint is all off the rail tops.
 The middle curve. I found a nice cleaning block at Micro Mart that does not scratch the tops of the rail. It is a good size and you can see it in the photo.
 The west end. I am going to wait on the ballast until I get some ground foam down. I hope to do that in a couple of days.
 The end of track in the yard
Leaving Weigh Scales and just before the bridge to Paxinos. I had a run of the earth paint onto the fascia so will repaint that once everything else is done.

Tuesday, March 15, 2016

Continuing with Weigh Scales

 Some time ago, Julie had put up some backdrop on the east end of Weigh Scales. If you look back a couple of years you will see her in action, painting the wall. This is where she stopped.
 I have been looking at the beautiful trees she drew and something did not see quite right. Now that I am putting up distant ridges, I could see that we had made the trees too tall and we had no distant perspective.
 So, now I have to continue the trees that I drew further to the west and then blend them into what she did - quite a challenge as I am no artist.
 So, the first thing was to put up the basics of the distant ridge line. It is to reappear as the lower hill drops down.
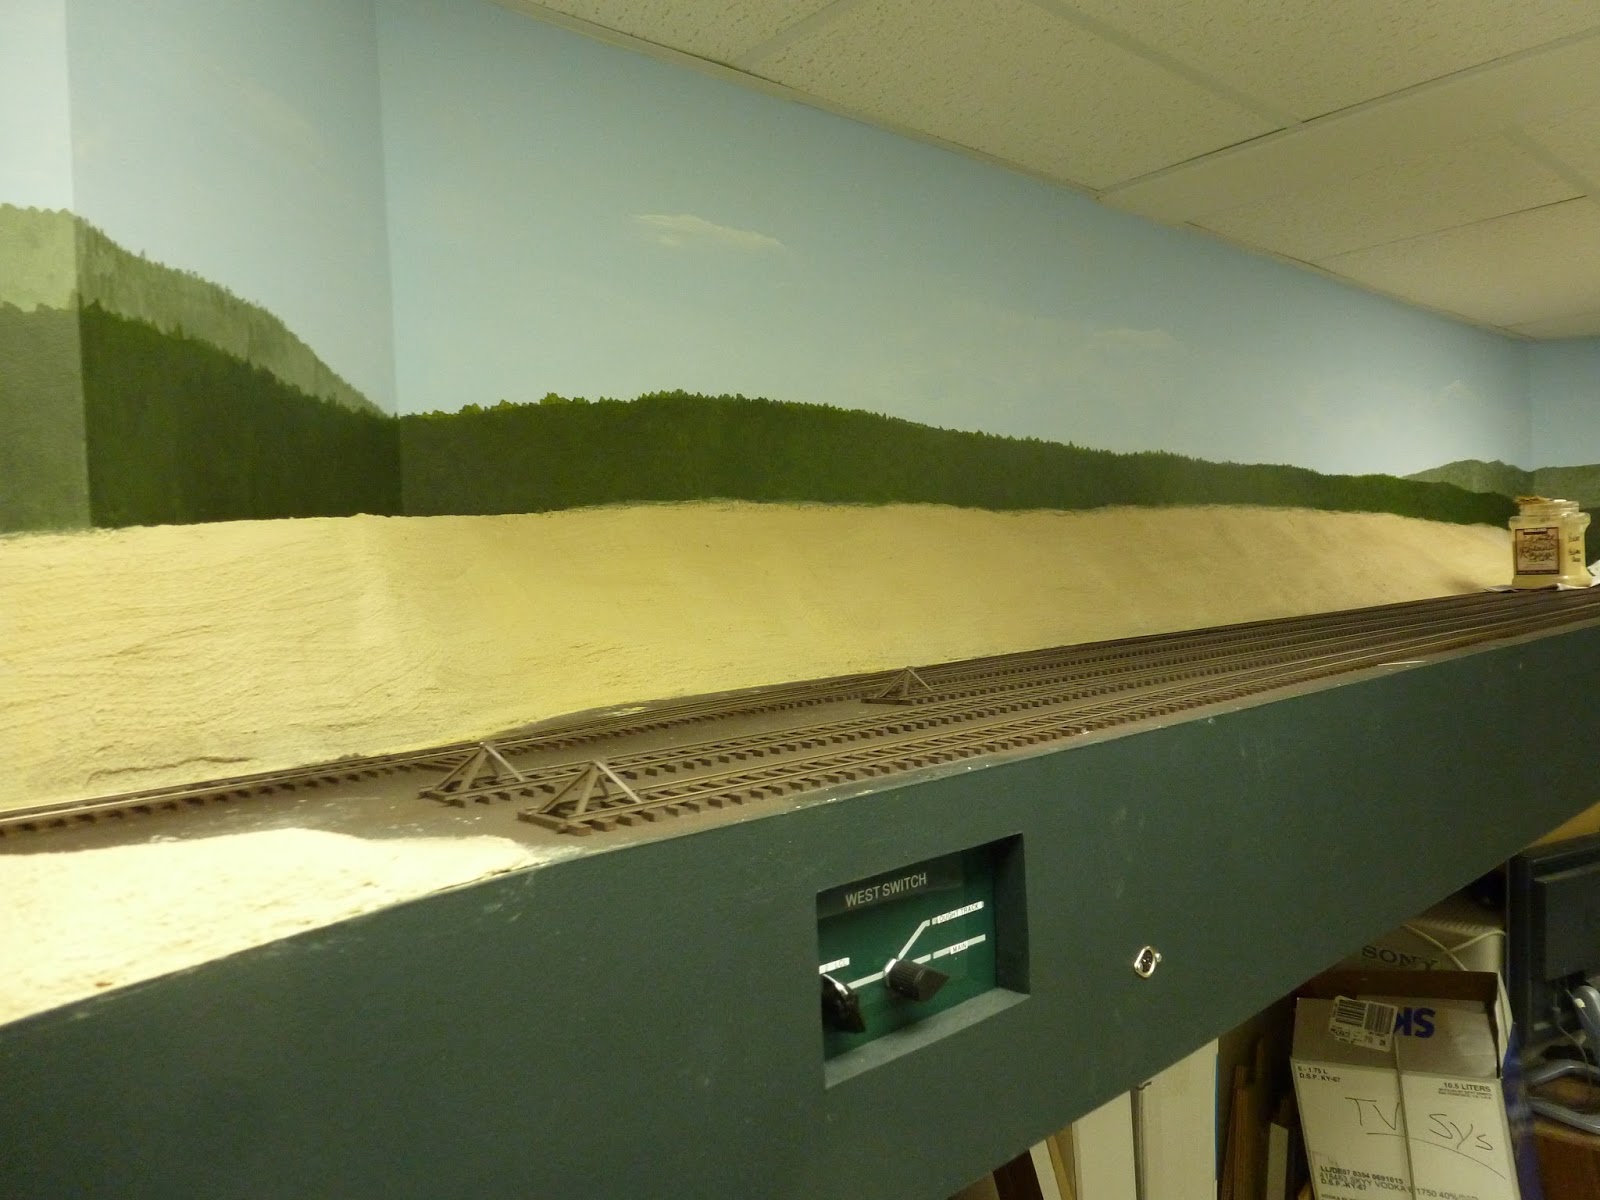
 I brought the ridge line around and covered the upper quarter of her trees with my ridge. Things looked better already.
 I carried the ridge down to the rising hill in the Shamokin Narrows. It disappears again.
 It tapers off behind the near trees.
 Now I have to go along and put the suggestions of individual trees onto that background color.
 I am working along and put an open field at the joint of the lower colors to distract you a little.
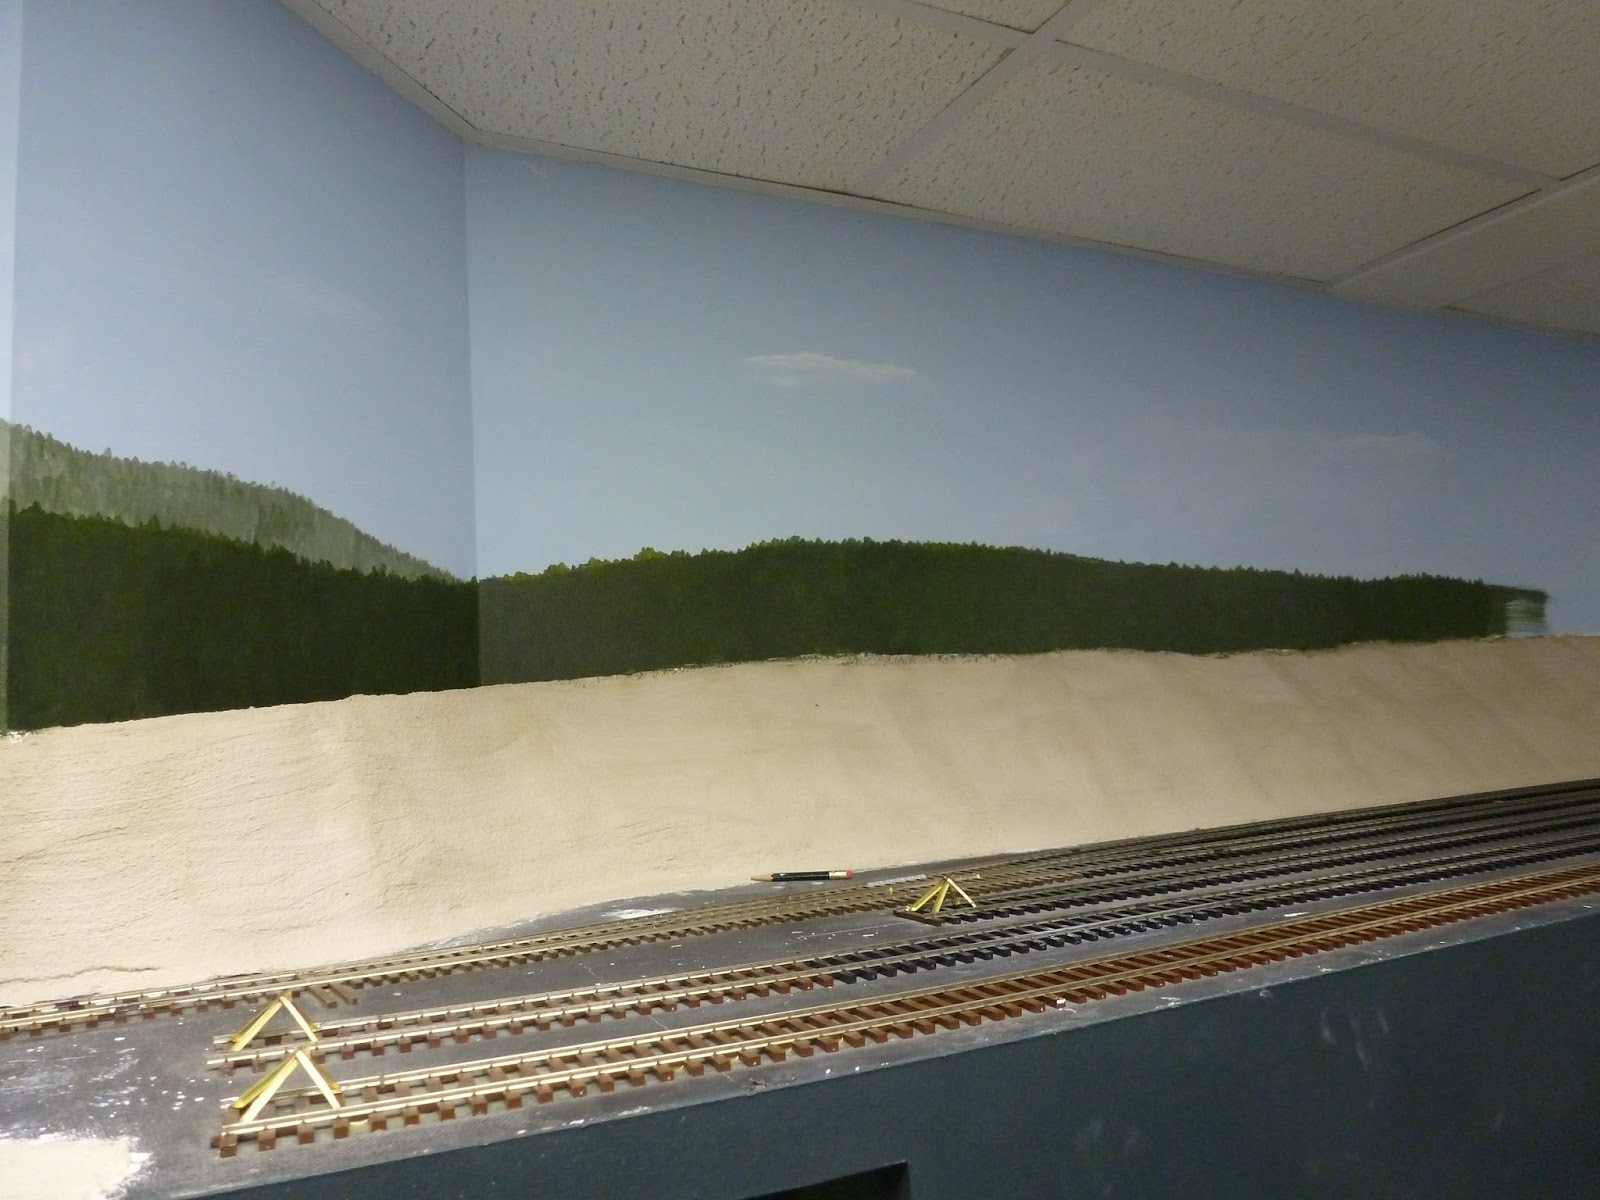
 Coming down to the home stretch on the ridge.
 Finished the ridge - about 2.5 hours - and put on the base color of green for the near trees. Problem number one is that my base is more olivey than Julie's colors. Hers are a crisper green.
 Her trees are a brighter green than mine are.
 Well, we have to make it work so I tried to get more green into the lower tree impressions than I had used in the earlier sections of this color. I began this at the joint in the wall where I will have some tall buildings so it will not be so noticeable. That is just behind my head.
 The tree detail is coming closer to our destination.
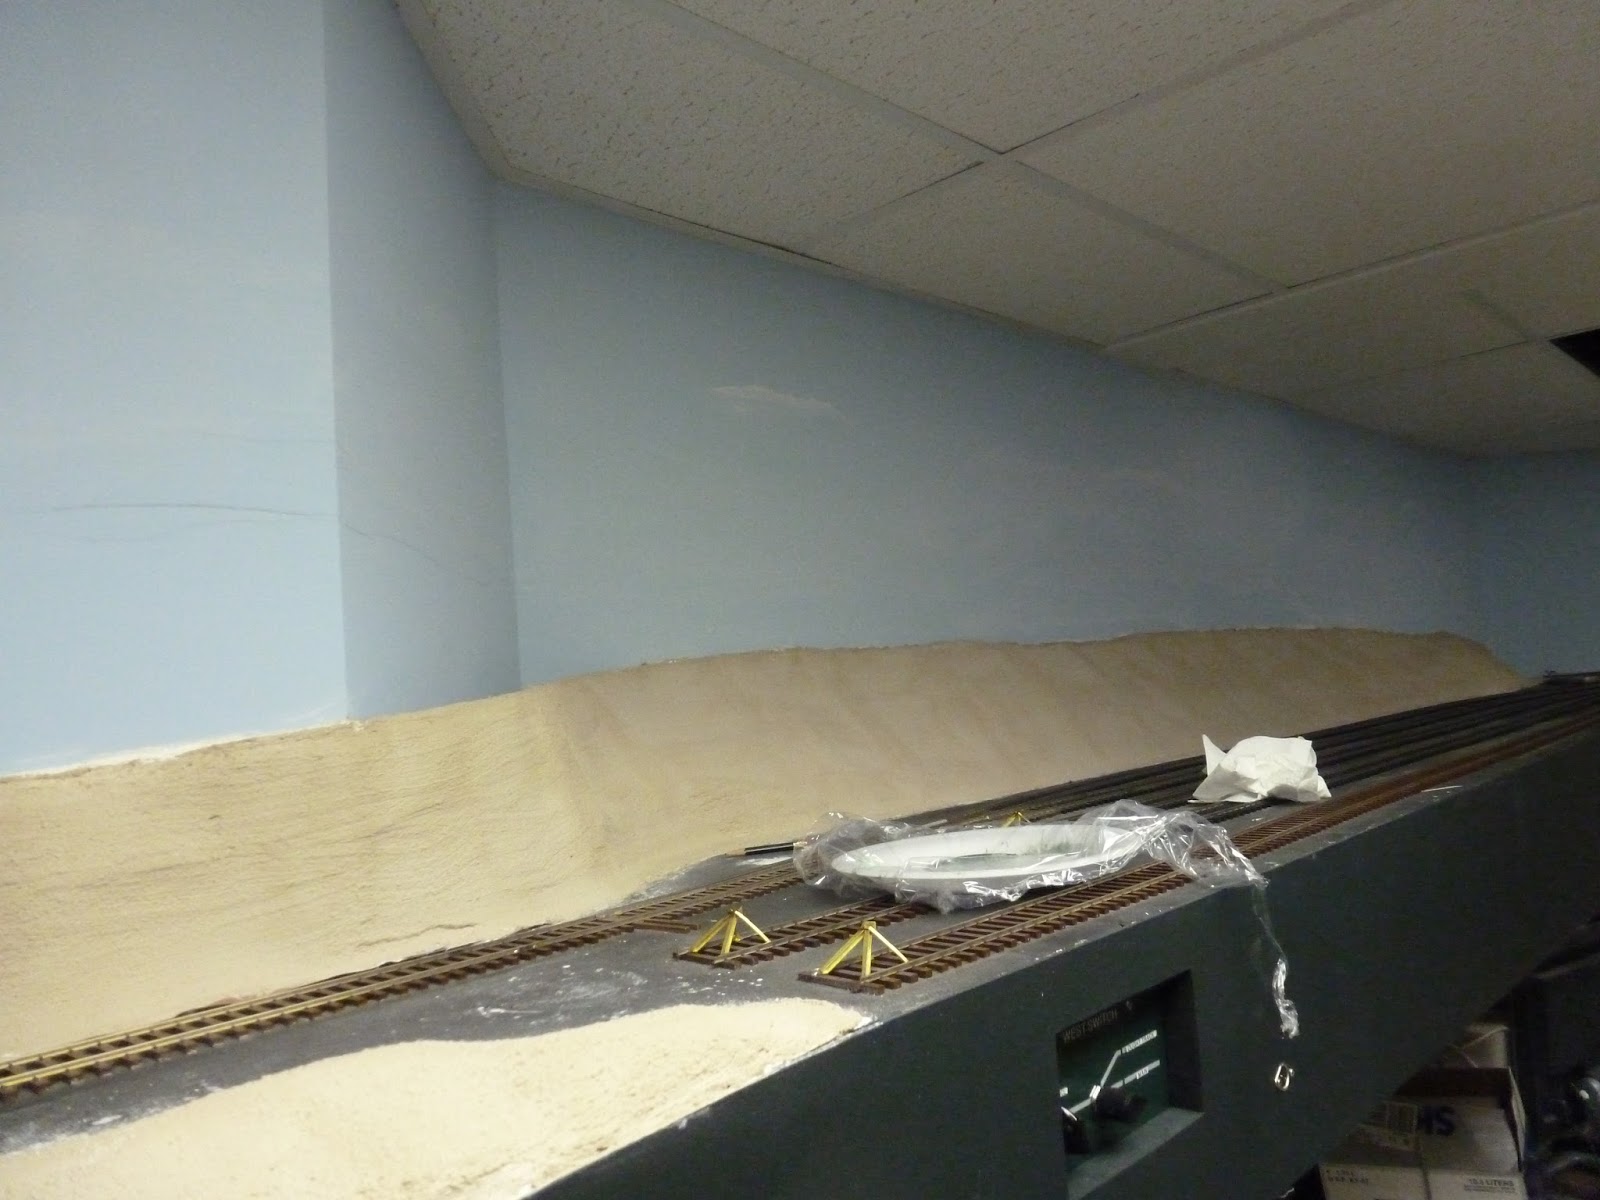
 Well, we are joined up and I am pleased as it is not too obvious
 A closer look under that field and it seems okay.
 I still want to spray the overall scene with flat clear to tone down the sheen of the acrylics. I'll try that soon.
The joint seems okay - I am happy - another two hours spent in an odd shape - the old bod aches.

Sunday, March 13, 2016

Adding color to Weigh Scales

 So, here is the master at work. I am now putting trees on the distant hill color base that I mixed to match what we had done with Wendy. The ridge line drops below the near hill as we approach the camera so that is why it is shrinking. I am putting on the trees working to my left.
 Here is the finished view of what I did with the distant hill.
 You can see how it will disappear behind the foreground hill.
 Now I have added the near hill which will back uup the future trees on the plaster hill.
 I like the look of the distant hill better than the near one but i am still learning how to get better definition of the tree tops in the deeper colors.
 Here is a really close shot. I am using some black, yellow, medium green and grey green to make the near trees. You can see the base color to the right rear.
 Here is a view as I am going along. The black plate holds water for the brush. I dip to make the brush moist as I add color. I am using acrylic tube colors for the near trees. I mix them on the brush with the background color.
 Here is what I accomplished in about 5 hours - that includes the hazy background.
I have about another 2 hours to finish as I am going to bring the ridge line into view again as the hill drops down. I wish I could get more color variation in the near trees but I come close to what Wendy did. I will keep fooling with that as I have a lot of wall to go.

The novice tries his hand behind Weigh Scales

 Well, here we are behind the west end of Weigh Scales. I have to cover the blue with the hazy sky and then the hill sides. So, my palette awaits me.
 I will do the whole wall to the corner - a distance of about 25 feet.
 I have added the haze and tried to make some light clouds. Wendy said the secret was keeping a wet edge but I got carried away and my brush was too wet. I learned to use paper towels to blot off some of the water and color and then spread the remainder. I had to go back multiple times as the white would run due to the excessive moisture. It settled down over time and came out okay, I think.
 Here is a view down the length of he wall. The clouds are very subtle but I prefered that to heavy statements.
 A closer view at the middle corner
Here is a view of the end corner with more clouds. I got better as I went along. That wiping technique stood me in good stead.

Completing the backdrop behind the yard

 Well, Wendy has finished (after she painted this)  and the product looks good. I took many notes on her last visit so I could try to duplicate what she did - but not as quickly! She has now finished this portion with the deep green near trees
 I like the effect of the sky and the horizon but I may have made the hills a bit low. I did not want to attract the eye to it. I seemed to raise the hills as I went along.
 Looking to the East, you can see the ridge line goes along with somewhat more prominence.
 Here is a closer look at the trees she simulated. We used the work my daughter, Julie, did as a model to achieve the colors I wanted.
 The completed scene all the way to Mook's Corner. The ridge disapperas as the hill comes up.
She just put up the tree line. I have to build the plaster hill that will come up to meet her tree line and cover those lower tracks you see.