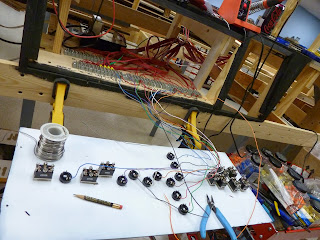
Well, here we are at the starting position. I have a group coming this weekend and I have to get the panel done. In lieu of a hinge, I placed two clamps onto the bench work to hold the panel while I do the wiring. I have painted the panel in a reverse fashion as it is a piece of 1/8th inch Plexiglas. First I paint the background (after putting tape on to represent the track, and then I paint the track color. I had a little problem with the track color as it attacked the previous coats so I will have to remake the panel after the visitors leave.
Now I have flipped over the panel to show where I have to work. All the switches are in place. It is nice and white as I painted that for the track color.
Here we are in process as I am soldering the wires to the switches. I am also having to check the functionality of each switch as I go so I do not have to do too much backtracking to solve problems later. This involves getting up on a ladder and looking at the track direction as I through the turnout switch. Up and down, up and down. We are controlling the holding loop hanging from the ceiling.
The wiring is complete and I am beginning to put the wraps in place to make it a little neater.
We now have the panel in place and operational. Total elapsed time to do just the wiring - 3 days of free time. The black hole to the right is the frame for the next piece of panel which will hold two small TV screens to show the position of the trains at the ceiling.
Monday, November 11, 2013
Subscribe to:
Posts (Atom)


