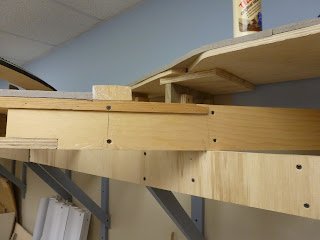
Okay, we now have to tackle the tough part of finishing the exterior aisle fascia. We have to cover this bump out.
I had to add a few strips to level the right leg of the bump out as it torqued when I put it in. So I ripped a 1/16th strip and then added it to the top of this side and to the bottom of the inside of this leg I now have a true vertical surface.
This side was fine so no additions
You can see the cant of the pine board but the masonite is vertical as it bends out to cover the bump out.
Looking back, you can see the whole run to the bump out.
First piece on. The masonite did not like the tight bend of the bump out forward end so it took many brads and clamps.
Our piece ended here so I needed a clamp to hold it until the glue dries. I find that putting in two pieces is easier than trying to get a perfect cut in such a complex area. I do have to cover the curves with one piece though, to make the joint easier. You also have to be sure that the two end surfaces are vertical.
Looking up, curves everywhere.
Looking down - we are getting close.
Last piece in and a clamp holding the joint together while the glue sets.
Bottom view again.
Now the body putty goes on to smooth the joints. I have to use this material as the masonite is a very glossy and smooth surface, like a car body.
Top view
From the end of previously finished fascia.
Painted today - feels good to have one piece of the project done!
The whole stretch is done. Now I have to build the bridge crossing over the aisle.
Back to finishing up Weigh Scales ballast before I do that, though.
Saturday, June 25, 2016
Subscribe to:
Post Comments (Atom)


No comments:
Post a Comment