Saturday, May 6, 2017

Building another crossing with two bridges

 I have a major crossing that goes over your head as it crosses the aisle with the branch going over the aisle and the main line at an elevation of about 76 inches. To do this, I have an Overland pin connected truss bridge and a plate girder ridge. The truss is made in China and I have to build the plate girder. The truss has a walkway that I cannot use as it is not prototypical for my area so I had to remove it and its braces from the bridge. You have seen the painting process in an earlier posting. The next issue was making the track structure for the bridge. You cannot work in the bridge as you cannot reach the track so I needed a way to make the track in a fashion that fits into the panels of the truss. After carefully measuring the dimensions of the panels, and computing the number of ties with the spacing I desired for my recently stained ties, I came up with the jig you see here with some ties on it.
Every tie has to be spiked (the guard rail will come after some painting is done) and this was a problem with every thing wanting to move around. I am using a six foot long section of code 125 rail for my running track and that was sure wiggly. You can see the spacer for the girder that delineates the panel onthe bridge.  
 I set the spacing with the dimension of my tie plus a 3/32 stripwood spacer and that gave me 22 ties per panel. I eventually learned I had to tie that all together by gluing the end timbers to the ties to hold that panel in place. I could only do two panels at a time and one panel was from the previous build so it was slow going. The most important things was to maintain that panel spacing. You can see the jig has guards on top and bottom to hold the ties in alignment easily.
 After a while it became much easier to do but we had several false starts until the process became self evident.
 You can now see the complete deck with guard timbers and rail. Now, I have to build the girder bridge, and add the guard rails.
It's now Easter and another grandson loves to run his trains as well. All work stops for a while.

Travelogue

 Well, I was asked to provide some pictures of the layout to a fellow who is doing a presentation of PRR in O scale to the PRRT&HS meeting this May. So, these shots are just a walk around the layout as it is now for you to enjoy. We start in the diesel shop area were some Alco's and A Trainmaster are being serviced
 Here is another view looking in to the fueling area.
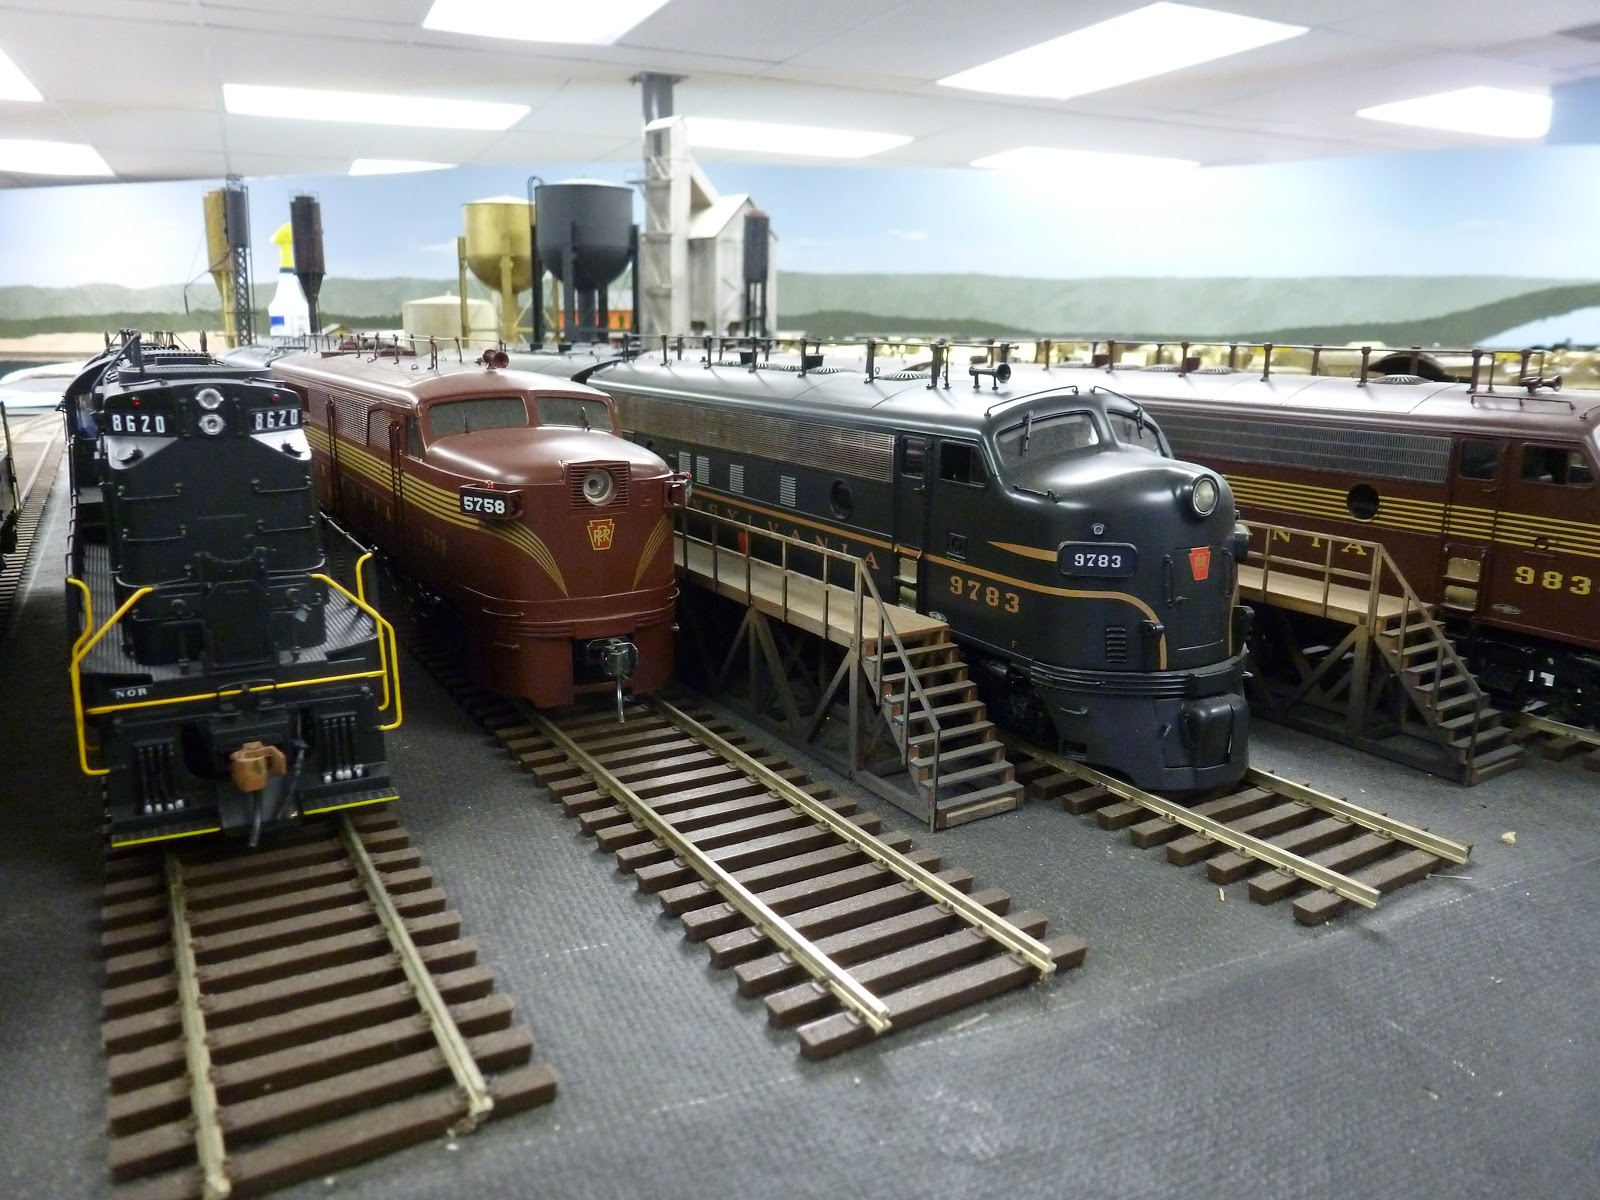
 Over by the location of the future diesel shop, we see some EMD units, including FP7's at rest.
 A closer view. The hostler better be careful about the positioning of that last unit!
 A shot including an Alco PA set.
 We move ontot he yard where business is a little light on the east end of the yard.
 Further on, we see some new TOFC equipment
 Getting into the heart of the yard, more conventional equipment of our interchange partners come in to view.
 Some new pipe heading west on FM flat cars
 A double headed freight off the branch is on the arrival track.
 A freight is being switched in the yard while that freight awaits its turn.
 Up on the branch, some cabins await assignment.
 A freight is leaving Weigh Scales for a trip up to  Mt. Carmel.
 Some hoppers waiting to be sent out to local mines
 A local enters Weigh Scales from the west
 Another train comes up through Paxinos.
 Looking forward, more of the train is in sight
 More cars
 How long do I have to wait at the crossing!
 Seems forever, no wonder it takes four engines!
 I think the end is in sight.
 Finally entering Weigh Scales
 Making up another train
 Heading west
 Overview of the west end of the yard.
 More overview

Continuing the landform

 So, the abutments are now done and we are adding the plaster in the area
 More webbing as the crew gets ahead of me.
So, the abutments are all painted and the land form is as far as we can go until I set the rear area.

Work Continues


 Well, I have been getting a lot of pressure for new postings as I have been very busy with family issues (new grandchild) and other activities. So, I though I would start with a view of one of our grandsons doing what he loves - which is running Grandpa's trains.
 So, now let us focus on what has been happening. I am trying to move along on the branch line and one big thing is the get the bridge over the main line situated with abutments and then the land forms that they hold back. First thing was to take out the bridge and its temporary supports and place hte real base. I also wanted to weather the bridge using the new techniques I had learned from Lee Turner.
 So, the bridge has been removed and custom sized blocks added to eh plywood base to hold the abutments at just the right height so the rail line has no bumps as it goes on and off the bridge. This was complicated by the fact that the bridge is on a grade, as is the plywood base, and they are different in their variation. Alan is our woodworker and he made exact blocks by laminated pine sections together and then planeing them to the just the right height. We took several measurements to be sure he had the right dimensions.
 The bridge itself has now been weathered using those Vallejo weathering washes and looks lightly rusted and like it has been kept up but not recently painted. It is sitting on the future Susquehanna River
 The abutments came from Scenic Express but I had to cut them down from a double track bridge to get the size I wanted. I took out he middle section and then blended the stones together to hide the seam. I used acrylics to color the stones and weather them.
 When I looked at the land forms, it was apparent that I would need some wing walls. This is a Scenic Express wall as it comes from them before coloring was added.
 I made a bevel cut in the abutment to blend the wall into the side
 I checked the depth and height of the cut to be sure I could get the blend effect I wanted.
 Then I had to block the wall section at the angle needed and use carpenter's glue to join them together.
 I placed a piece of stripwood behind the joint to help in its registration.
 So, here again is the before shot, clearly showing those wood bases for the abutments.
 Eastward abutment is now mounted and you can see how I will blend the land form into the wing wall. I have to do the work behind the bridge before I do that however.
Here is the westward abutment in place. I will bring the fascia up to meet the wing wall as a next major construction phase.

Wednesday, March 15, 2017

Construction Continues

 All work on the layout stopped as I had to get a passenger car ready to go to the custom painter. It is a model of the Queen Mary, an open ended observation that was used up until the end of steam, so it is appropriate for the layout. The importer, Precision, added two large ice hatches on the roof. Unfortunately, the car did not have these so they had to be removed and the roof patched.  I rolled some brass to the curve of the roof and then cut the patches to match the large holes. They are now soldered in place and some body putty added to fill any gaps in the opening.
 The putty has been sanded off and the patch looks okay. I have to re-scribe the seams that the roof has between the roof panels. Rivets will be added using the Archer decal rivets.
 Here is the car ready for the painter. It needs marker lights and a drip strip along the rear section of the roof. He will add that.
 Back to the layout. I had Mt. Albert Scale Lumber cut me 350 basswood ties in a scale dimension for our bridge over the aisle so I did not have to mess with that. I now have to stain the ties a deep black to represent creosoted ties on the bridge across the aisle that we were working on.
 I used Minwax ebony stain and soaked them twice to get the deep color. They look pretty good and I have plenty. They are much deeper than a standard tie as they are used on a bridge
 So, here is the bridge. It is the Overland Pin Connected Truss that was made in China some years ago. Just looking at all the members tells me this will be a royal pain to paint. It should look lacey when you walk underneath it though!
 Once I removed the walkway, which had to be done to allow you to put track on it, I also had to un-solder the brackets that were used to hold the walkway on. The ties would not sit evenly if I did not do that as you can see the bracket goes over the girder. So, they were removed and put with the walkway in the box the bridge came in.
 Now, I have to set the bridge in a position in front of the paint hood to be able to spray it.
 So, I took a couple of large boxes and stacked them in front of the hood. The hood creates a strong enough vacuum to draw the fumes out of the house even though I am spraying outside of the hood.
 I have to do several coats to get every thing covered given the many angles and members. In the end I put on 4 coats and I then had to use a brush to get inside the girders to paint that area since one can see in from below. The bridge is now drying and I have to strart making the track section to span about 5 feet.
 We also conducted two clinics on weathering with Alan Balma, Jim Mucka and Ed Rappe on a some cold days. Each brought over a couple of cars and we put on washes of dark brown and rust and then sprayed grime and road dust on the cars to blend everything. They came out nice and the guys are excited to try the techniques that Lee Turner had showed me. These were my first and second hands on clinic and I have another scheduled for next week as well.
And here is shot of why I do all the work. My grandson Wade was so excited and happy about running some trains as he sends a train up the westbound grade towards Northumberland. It is a leased Reading T1 that he is controlling and he just loves it!