Wednesday, June 24, 2020

Another engine or two join the fleet - Some Trainmasters


I have two of these Sunset Trainmasters. I bought them a long time ago and they have languished as their paint jobs were not correct and they were somewhat tatty. So, here is one unit that has been repainted and slightly weathered as they were new in my time frame. I used the Whithers book as my reference. 
Inside, I am going to put in lights. I had to change one headlight casting as it was wrong - the model came with different headlights on each end. Why, I cannot say. I also had to extend the length of the headlight wires as the units are so long. 
Here it is assembled. Assembly is tricky as the engine chassis weighs about 5 pounds. These things are beasts but they run really sweetly.  The railing and antenna are very light wire so they easily bend as you try to handle them. I learned to pick them up right behind the end platforms. 
I dusted the trucks to highlight all the details. I had already put four wheel pick up on them. 
Here is the pair. They mate easily and will haul any train I can assemble. 
They did not operate in my area but I figure they were testing them in 1957. 
So, now I have a bidirectional lash up. 
They are early Samhongsa efforts but they really made a good mech on these two. 

Sunday, June 21, 2020

Another Geep

 Well, after doing that passenger GP7,  I had another freightGP9 that needed conversion. This was a newer Oriental Model. I started by removing the wrong horn in the wrong location. I added the masts for the antenna and made a new horn.
 New horn is now in, in the correct location.
 Receiving coil added
 It only has 4 wheel pick up so I made wipers and created mounts for them.
 The wires will be added to the frame
 Cab was soldered together, just like the older one. Now it is separated . I also located the cab roof brackets for the antenna.
 These parts are now ready for black paint.
 The frame is a problem but more on that later.
 Here are our wipers, ready to go.

 Here I have added the mounts and wire up from the frame along the long nose.
 Antenna wire is now in, except for the cab roof.
 Here it extends to the front of the unit.


 The fuel tank was very under detailed so I added a fuel gauge. The pipes on the air tanks were just plain wire so I removed them and added castings from P&D for those pipes.
 As I looked at the photos of the engine, I saw that the fuel tank had 8 small round plates along the bend lines n the tank. There were 4 to a side, I located their positions, again using the photos. I took brass pins and turned them in the lathe to match the size of the plates.
 This is how they looked when I was done.
 Now, the problem with the frame. It was stamped for a unit that had a steam generator. So, it had a water fill in the side rail. I had to remove that as this was a straight freight engine. It is the left fill. You can see that it also caused the slot in the side to be shortened.
 So, here I cut out the fill
I have made the opening square to ease a piece of brass in. 
Here is the completed modification. Now on to electronics and painting.

Heavy PRR Bumpers

 Scenic Express has plaster castings of standard PRR concrete bumpers. They come painted but with no way to attach them but with glue or caulk.
 I wanted a way that I could remove them to ballast or paint around and that would be more secure than glue onto homosote. So, I figured a metal tube would be the way to go. I drew a line about 1/2 inch from the face to hit the beefiest part of the bumper. Then I drilled on the center line of the bumper and on that line, a vertical hole of 5/16 inch diameter.  I also cut tubing 2 inches long. So I made the depth of my hole 1 inch.
 Here we are with the tubing installed. I figure I can lift the bumper off the layout at any time with no problem
 So, now we weather the bumpers before we install them
 Ready for installation
 Here are the three for the wreck train. There is one in the station siding  in the distance as well.
 The engine terminal is he big problem. If an engine is left unattended, it can take a 5 foot fall to the floor. Not good!! So, this is the real reason I used these.
 I drew a line along the back of the engine area about 2 inches from the edge of the table. I used this as my location guide for the drill. It centered it on each track.
 Then I used a vertical driller to make perfectly vertical and square holes at the end of each track
 Here is a piece of tubing set one inch into the table top. The bumper is then placed onto the tubing. It is a nice snog fit.
Here is the track line up. I did add a small piece of track to that near track. They work great!

That dreaded detail - ballast

 Well, here we are in March, looking at the balance of the yard and main line that had to be painted and ballasted. A sea of stone is in my future.
 Just before Covid hit, the guys gave me a hand with the start of the project. I had painted the track and the turnouts so we were ready for stone.
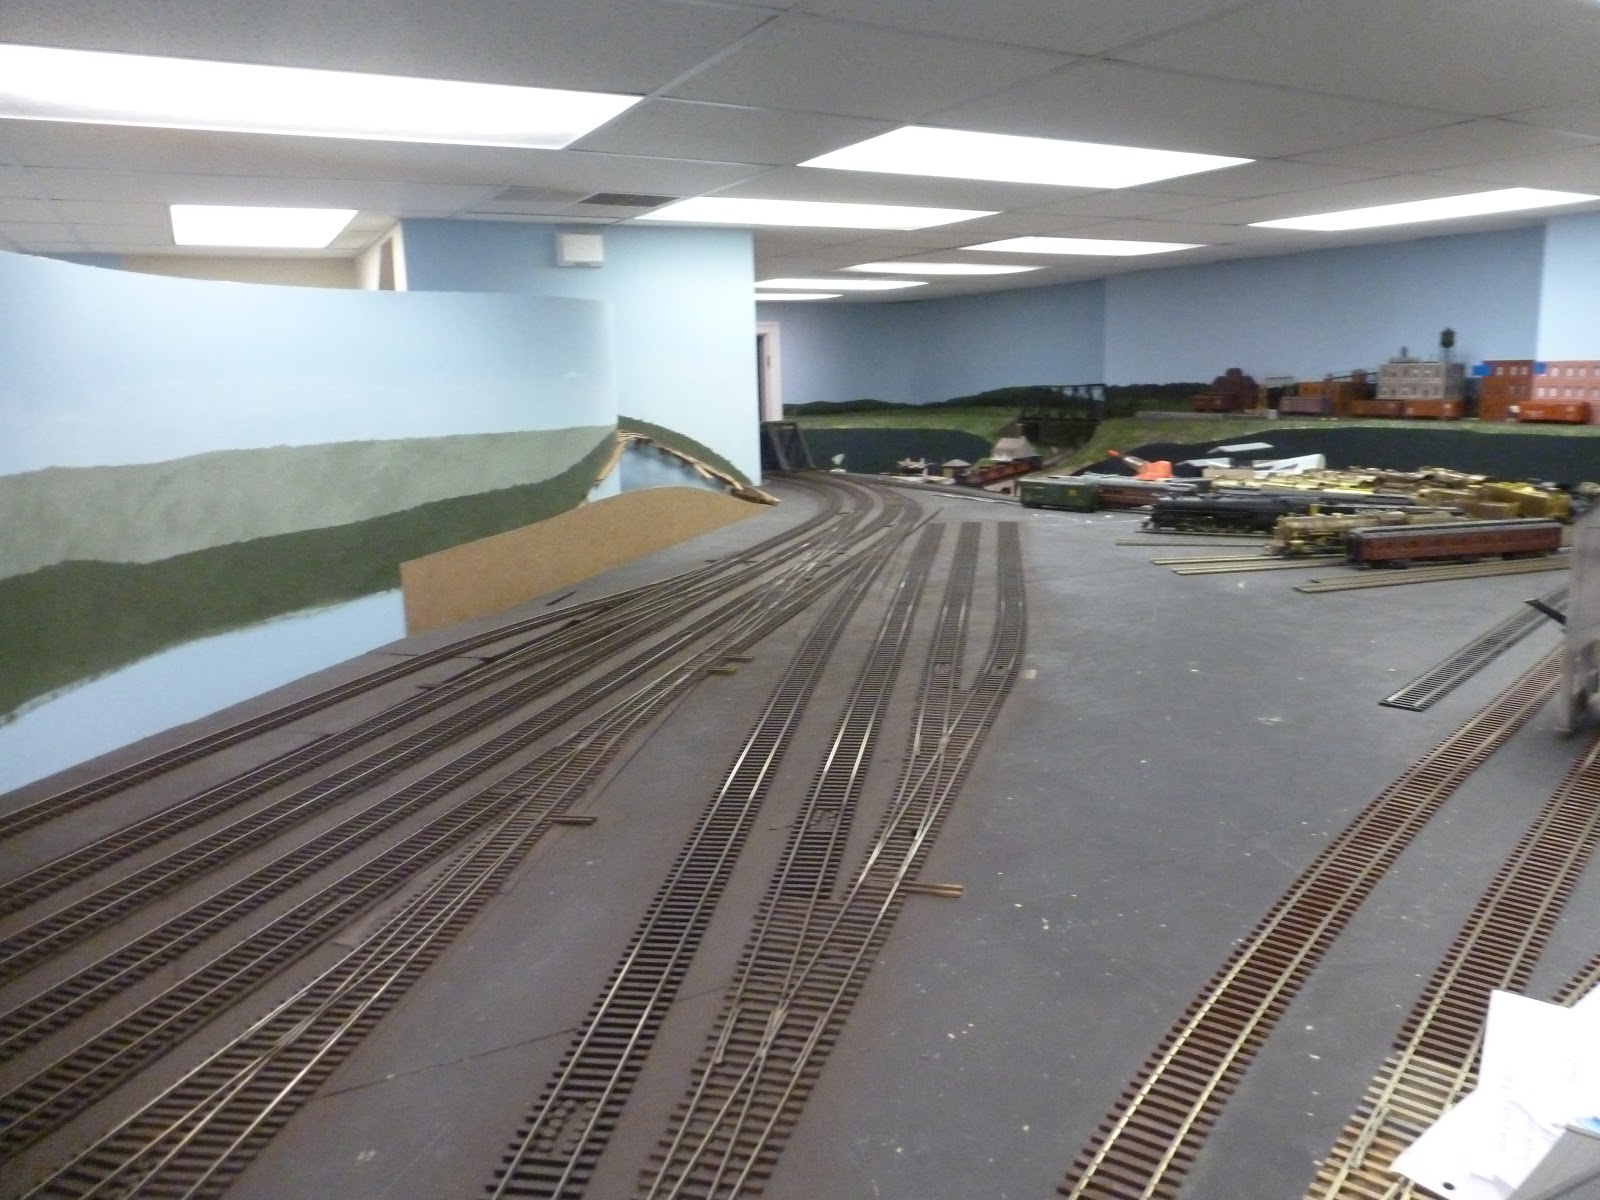
 This is an overview of the area to be tackled - a lot of turnouts and track. Also not very accessible in some spots.
 These views kept me from getting started when the guys could no longer come over.
 Looking at it is not making it any easier.
 Rich, being the youngest, had hopped up onto the layout to do the hard to reach spots before the virus hit. He is focusing on the main line here. 
You can see he is working towards a completed section that was easier to reach

 We use carpet remnants to protect the track when we work on top of the track
 Here I set up for my last night with the larger crew. Then meetings were suspended.
 Now I feel lonely
 Only one ballast bowl out suffices now.
 After about a month, most of the ballast is down. Now the problem is gluing it without disturbing it.
 I used four colors. The main is a soft buff color. The arrival tracks are a grey and white blend, the branch tracks are a dark grey and the yard is black cinders, They are also different sized stone. Main and arrival are 30 grit, branch is 40 grit and yard is very fine sand.
Main line is done and a first coat of glue on.

 .
 The main and branch tracks will match the colors across the bridge

 Once the stone has set with the glue, I paint the ballast to weather it.
 The author in protective gear. I am even equipped for Covid!
 The weathering really enhances the look of the ballast
 Close to completion. Spraying the track also indicates where the glue did not cover.

 I am collecting the tools in one place as I start clean up. It seemed like it took forever.
 Here is a close up of the weathered track. Not heavy but some accents.


 Here the cars have migrated to fill the space
I put this in to show how I indicate the location of the uncoupling ramps in the yards. When the ballast changes color, the ramp is located there. So, the black is where the cars should be uncoupled. 


 I have added some structures and I have also spent about 2 days getting all the turnouts freed up and working again.
 The cabin track shows nicely here. The tracks to the right will be the work train and the clean out tracks.
 Looks nice now
 A modern interloper to test track power routing.
 I added PRR concrete bumpers at several places. Next post will show them.
 Approaching done
Done