Friday, December 15, 2017

Finishing the cut under the branch line bridge

 Well, we have the ground cover on the hill as a basic coat. Now we have to fill in the open area between the fascia and the track below the bridge.
 I am putting the ground cover on the hill and trying not to cover the stone wall below.
 So, I began building the webbing in the open area after the ground cover was done. I am also trying not to burn my hands with hot glue in the process.
Working my way around the curve and building a low hill in the process.
  Ground cover and webbing is essentially in place before the Monday crew comes over.
 Covered the rack in preparation for the guys coming.
 They have covered the webbing with rosin paper and now Alan is putting on the plaster cloth.
 Alan and Mike are working from oppposite directions to cover the area.
 You can see the rosin paper is disappearing under the plaster as Alan comes around.
Mike is putting his last sheet onto the completed hill. Next comes the stucco and paint.

Plans for 2018

 I am trying to plan for scenery in 2018 and I have two main goals. One is to finish the two towns on the branch and this one is Paxinos. I am working to get a photo backdrop like I have in Crowl to complete this scene.
 It is just around the curve from Crowl so it would flow nicely.
 
 The next big area is the end of the loop between Northumberland and the entrance to Reed.
This is a big bare area with the Susquehanna in the foreground. I am trying to devise a way that allows another mural to be used. We will see how that goes. 
 This is how the mural completes a scene.
 It ties together really well.
 I like the look

Washington Group Gathering - Nov 2017

 Well, the gang from DC came down to see our progress in our annual gathering that Ed and I host. After a visit and lunch at Ed's, the guys came over to run trains and look at what has been accomplished since last year. We look at things daily so the changes seem so minor, but when they come, they see a big change.
 As you can see, there are deep discussions about the many topics that involve modeling.
 Old friends like Ray Grant, Dan McAuliffe and Rick Wright come and talk. In this case, Dan is running the branch, so you can see that the train is passing Ray and Rick but not interrupting their conversation!
 More of the train comes past Shamrock tank and down into Crowl.
It is really fun to see everyone and to share information, techniques and challenges for the future. You can see that some folks never move from where they start a conversation!

Monday, October 23, 2017

Finally, We Cross That Bridge!

 Well, it is Tuesday evening, 10/17/17 at about 9 pm and the track is being completed on the High Bridge  The west end is in and I ran a test engine and a track wiper car out onto the bridge, checking for symmetry in the curve leading up to it. It is about a 56 inch radius.
 The track joined up here and it is a smooth transition so I thought it would run well and it did. I need to place another tie on top of the bridge abutment. That can be done later.
 Here is the train waiting for the completion of the track work on the east end. That was a bear as I had to remove the light fixture in the ceiling so my head could get above the work to check for smooth joints. I also had to make a transition track first to go from Code 125 rail height on the bridge to the code 140 that was already in place on the mountain itself. So I had two sets of joints to do. It took about an hour to get that done.
 The train is now moving around the interlocking junction and out onto the bridge approach.
 It has completed that curve and the lead engine is on the bridge. All was smooth so far and the engines and train tracked nicely. There will be a lot of double heading on this track due to the grade so track quality is important.
 Here is a long view that shows the height of the location. We walk under the bridge as shown before.
 Train is now moving across the bridge and all is well


 Here is a close up of the two H class 2-8-0's on the bridge.
 Now passing the junction with the previously existing trackage. Everything still okay.
 First engine through the junction and the second engine enters the jointed section.
 Now the train is entering the jointed section and all is well.
Happy to see this as the mountain division has been out of service for 4 months while the bridge went in. I backed the train down the hill to check trackage with no problems. Subsequently, I ran several other trains backwards and forwards with no issues. I hope it stays that way - knock wood!

Wednesday, October 18, 2017

The Mountain Emerges

 Well, Monday night we completed the paper coating and some amount of plaster. I spent Tuesday plastering the rest of the structure so the mountain is done. I have to now coat it with stucco but that will have to wait as I have run out of time.
 Coming around the curve, it really looks impressive! Comes pretty close to the ceiling.
Here is the whole view. Once I get the bridge up, it will really be a nice entrance into the train room. I will have to wait until December to cover the snow scene with some more seasonal ground cover, however.

Making a Mountain out of a Mole Hill - Back to the Bridge

 well, the big project remains the bridge and its setting. The major hurdle is to get the topography installed. Here we have begun the webbing that integrates the previously completed hill side into the new area. A lot of cardboard strips are required.
 Here I am bringing the webbing around the curve and integrating the stone walls into the scene. I have a lot of burns on my hands from the hot glue. I hate working with that stuff as I always burn myself! Last Monday, one of our group -Alan - burned himself pretty good putting a paper covering on the webbing, so I am not the only one.
 I had to place some cardboard gussets or beams under the webbing to hold it due to the long expanse that it covers. you can see a couple that are under the thin cardboard and arcing down to the wall.
 Progressing slowly around the curve and starting to come down the back wall .
 Mount Everest comes more into shape. Actually looks like the Prudential advertisement for the Rock of Gibraltar. I am going through cardboard a rapid rate!
 Now we are close to done for this phase
 Here it is completed and we have to start putting up the red rosin paper to cover the webbing.
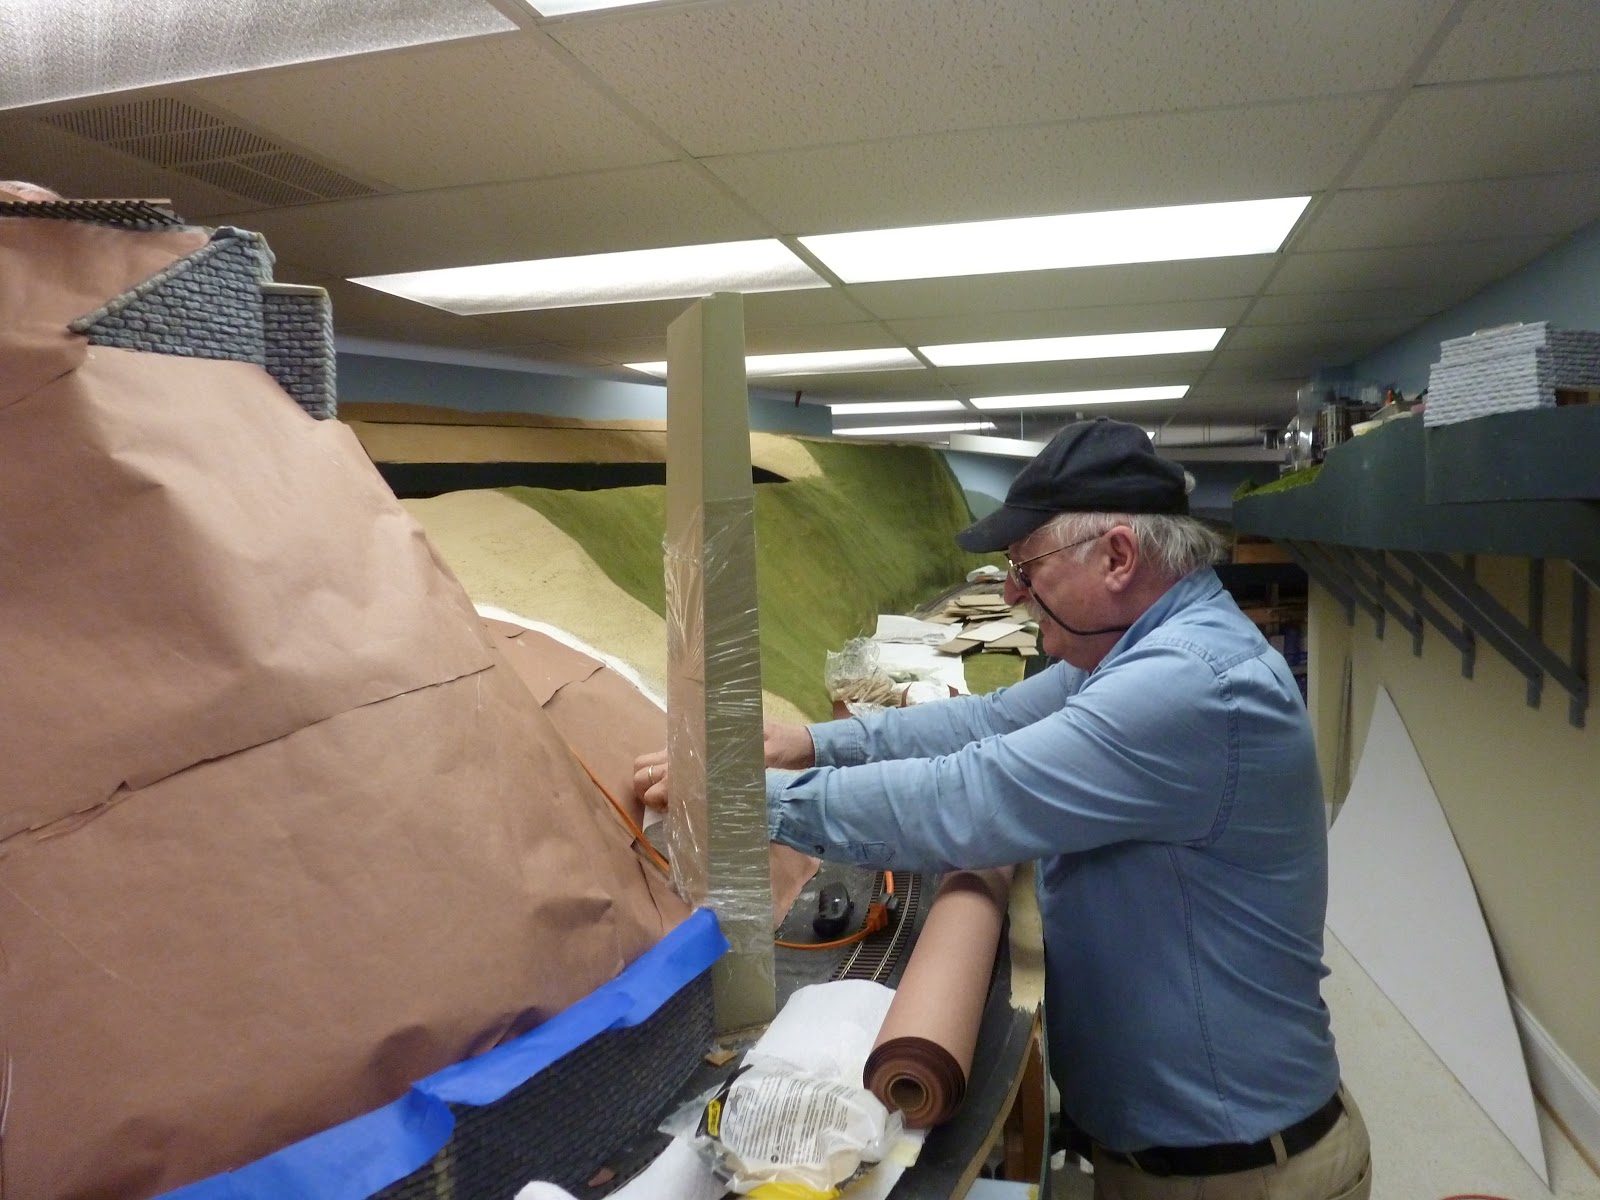
 Paul has put up the rosin paper and is now putting plaster cloth on the paper and setting it with water.
 Jack is working with him on this side and is also placing plaster on the paper.
 Around the curve, Alan is getting paper on the peak of the hill. It is before he burned himself as he is still smiling. This shot does illustrate the phases of the process, showing he webbing, the paper and the plaster cloth. After all this is done, we coat the plaster with a stucco like material to give it a grain.
 Mike is finishing the paper at the base of the hill.
Gale is helping me clean up the area that will be next for scenery on the other side of the layout. We have to integrate in another bridge at that location as well.