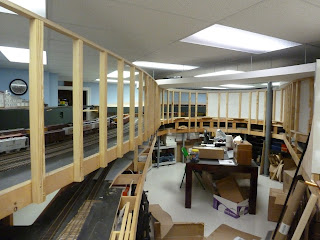
Well, we are down to the last section of divider framing that we have to complete. It is a bit difficult as we have to hide the column by expanding the wall to enclose it. This problem is compounded by it being on a curve as we swing from the upper deck to the lower deck as the base for the wall.
As you can see, I made a framing member for the inner wall that opens into a Vee shape to spread the sheetrock around the column. I had to make an upper and a lower one so that I could place the framing members. I used a cardboard template and a bendable stick to get the shape.
Now, I have to do the same thing on the other side of the column. The first post is in place on the taller wall section.
I obtained a large piece of cardboard to mark up.
This is the type of flow I wanted to achieve. A slight curve to the wall.
I added the forward studs as they are in a flat plane. They are all spaced on 12 inch centers. Once I had them in place, I could put my bendable wood stick on top of the upper portion of the frame to see what shape it would take around the column.
You can see here, how the stick forms around the column. It surprised me as the biggest part of he bow came after the column.
Here is an overview of that area. I will put the cardboard on top of the wood and hold it on place with a weight. Then I run a pencil along the wood stick to capture the line.
I now have cut the cardboard to the line and am comparing it to the shape of the wood stick. Pretty close to what we need. Since the forward edge is straight, I can use a ruler to make the line for that cut and make the correct former.
Now I have cut the plywood to the shape of the cardboard and we seem to have a good fit to the wood stick.
Here is another view of the plywood in place.
Here is the wall as it looks with everything in place. I made an upper and a lower former that I attached the rear studs to. The flow looks good and we are reaching the end of this phase. I only have to make an S turn to terminate the divider into a wall.
Here is a close up with the rear studs in place and some additional bracing to ensure everything stays plumb.
Here is the S turn coming to fruition and terminating in the wall. I have to make a provision for a tunnel for the main line.
Main line tunnel support in place.
The whole curve. Now I need to have some help in putting up the sheet rock. This is going to be a big project!
Tuesday, January 5, 2016
Subscribe to:
Post Comments (Atom)


No comments:
Post a Comment