Back around 1998 or so, Key brought out a run of F7's with a terrific drive system and updated details. They were really nice engines but in the case of the PRR units, they used outdated Champ decals that were totally wrong. The engine on the left is the Champ lettered unit and the engine on the right is last run Keys that came out about 5 years ago, also wonderful models and with correct lettering (although I would have liked a better buff color) . I had learned from Lee Turner how to sand off lettering and repaint and reletter. So, I though I would try to do that to the AB set I had.
This is the side of the older unit. The Penn lettering is oversised, the stripe is oversized and the keystone is very oversized. It is just wrong.
Here is the new unit. The lettering is gold which is wrong for my era but it is correctly sized, generally.
This is the box they come in with the A&B together. The new units are separately boxed.
So, we scope the problem and see we have to remove evreything below the belt rail. Fortunately the Brunswick Green is matched by the Scalecoat color.
So, I have completed that task on the B unit, the easier one to do.
There is some exposure o the underlying brass on the panel seams but otherwise, everything came off smoothly, with patience and time.
I was having difficulty with the running quality and ascribed that to the old 4 wheel pick up. It only had two wipers - one per truck.
So, I disassembled the truck on the opposite side and added a PC board and wiper to that side. I used nylon screws to reassemble the truck. I also found that the kingpin based pickup of the old wiper had oxidized so I bypassed that by soldering the pickup wire to the kingpin. What an improvement!
Back to the sanding. This is where you get nervous
I used two sanding boards with fine and very fine grit. I also used water as a medium to help the removal.
The A unit is now done. I had to protect the number boards, marker lights and windows.
Doesn't look too bad at this stage.
After masking the upper body at the batten strip, and also painting the whole door on the side, I sprayed both units with the Scalecoat Brunswick Green
Unwrapping time was when I was worried if I had covered any scratches, etc. Looked pretty good.
The light shows the new paint versus the dulled original paint. I will be dulling the new area after decaling so I hope to blend this in.
Starting the side stripe on the B unit. There is no real 2 inch stripe so I used a single stripe off a 5 stripe set which scaled out as a 1.85 inch stripe. It looked very different from where I had started but I was worried it might be too narrow.
When I got to the A unit, I was still worried so I searched through Champ 2 inch stripe sets and found that his last deals were closer to 2 inches at 2.15 inches wide. They looked a little better than the B unit stripes so I changed to those. I used Clover House rub-ons for the road name, Microscale for a lot of detail lettering and a newer Champ set of numbers for the big cab numbers.
The finished unit.
Here is the B unit back on its chassis
The A unit - I think I need to weather both units a little but that will have to wait.
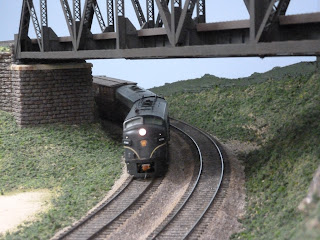
They look good on a freight.
Definitely worth the effort.
A nice addition to the fleet!.
Sunday, October 14, 2018
Subscribe to:
Post Comments (Atom)


No comments:
Post a Comment