Sunday, June 15, 2014

Time for Operations

Well, the operating crew came over for a couple of days and we spent a lot of time in the basement running trains. Rose was not committed to staying so she kept her back pack on for quite a while, but in the end, decide to stay with us and her cousins. Fortunately, we did not have any conflict over who was holding the throttle so Rose and Genevieve had that duty. We had no wrecks, pull aparts or collisions so all was good. I am trying to keep interest up so I have some helpers as they grow older.
 This is why we build these trains!

Thursday, May 15, 2014

Some finishing work - Volume 5

 Well, we have to get the control panel in at Paxinos and I am beginning to like recessed panels after what we did at Crowl. So, here we have cut out the opening for the panel at Paxinos.
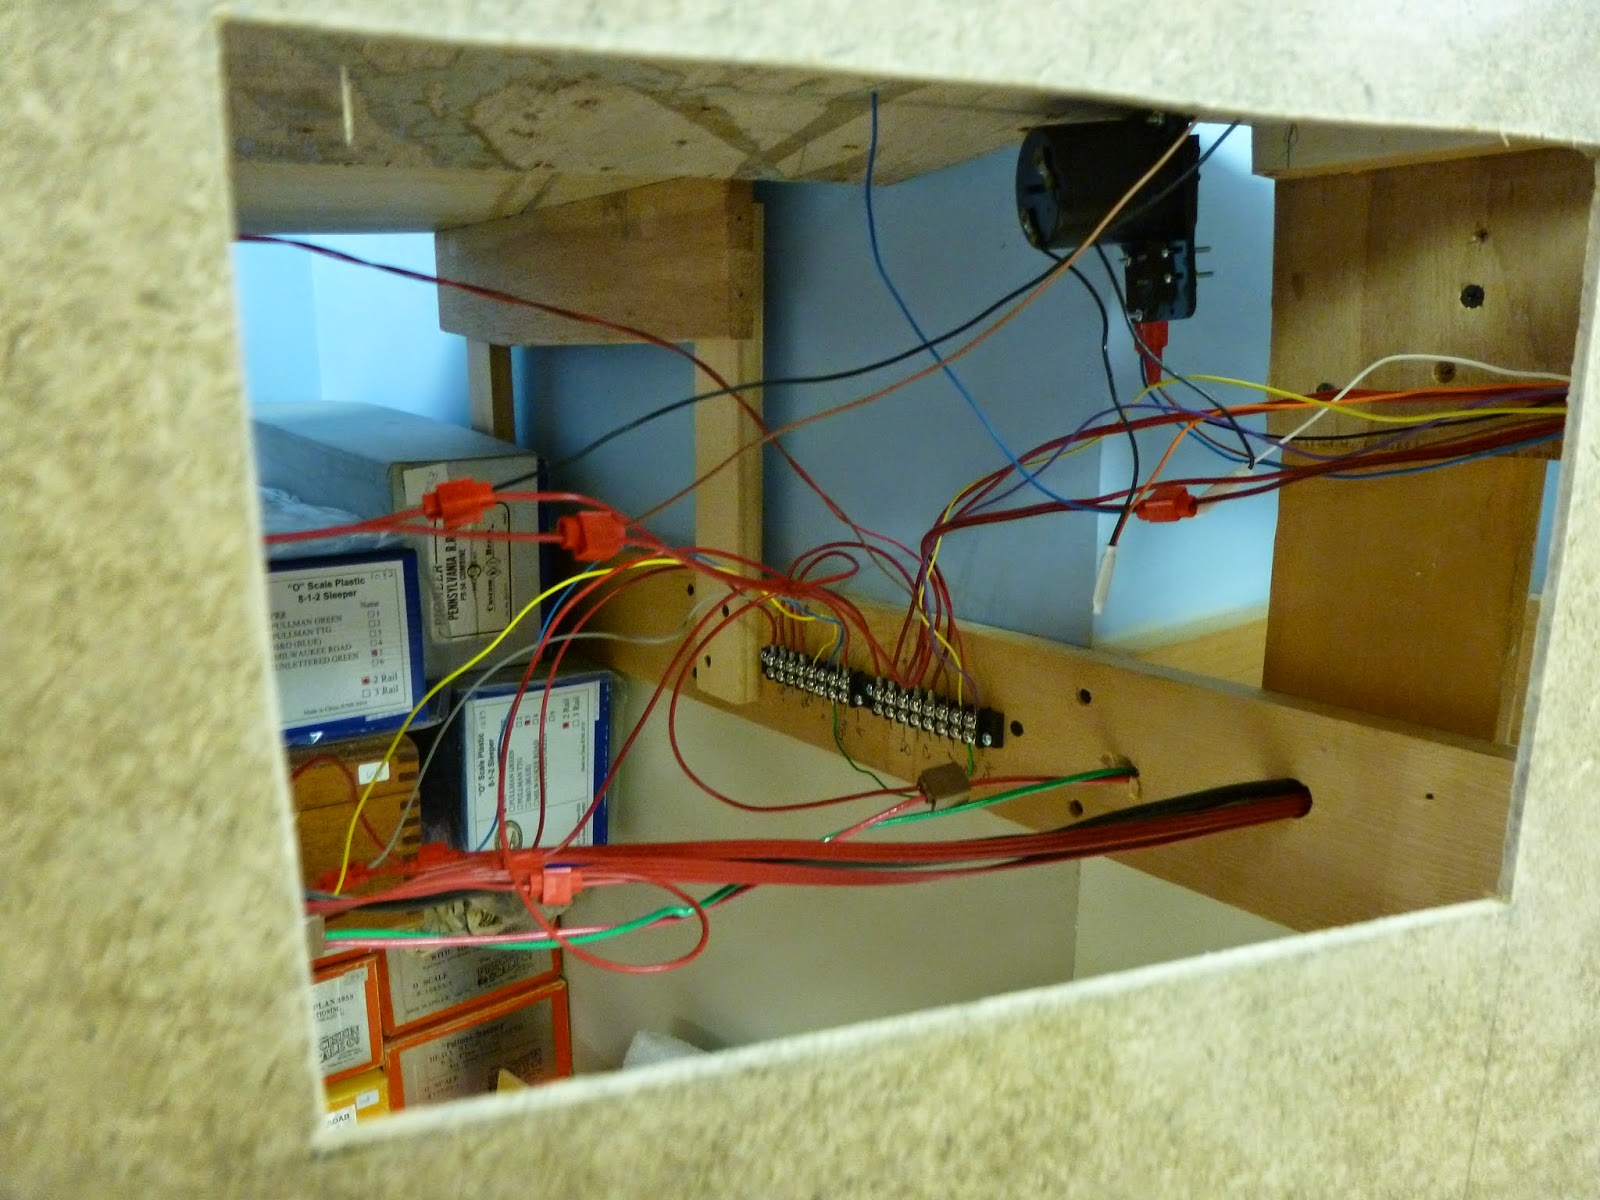
 I have previously wired all the tracks and turnouts to a terminal block mounted to the frame of the layout.
 You get a good view of it through the hole
 We need to have some spacer blocks to recess the panel so I ripped some 1/4 to one inch wide pieces so we can glue it to the back of the masonite fascia.
 Here is the finished opening.
 Another view
 Now I placed the previously wired panel in the opening. I wired it while at the bench. All I had to do was to connect the pig tails to the wiring block you saw previously.
 Here is another view. One we went through the shakedown, everything ran perfectly.
 Now we have to move on to Weigh Scales. It has a shorter distance from the surface of the layout to the top of framing so I will have to come up with another way to recess the panel.
 I cut the front runner and made some plywood brackets to lower a section so I can place the panel in that area. I am sizing everything up, using clamps to see how it looks. I had to change the design as I did not get enough horizontal space for the panel with the original design.
 I am trying to set it at a good spot in the yard for ease of operation.
 This is the revised approach. I now have 18 inches of panel space. I have to cut the plywood end blocks in a more complicated way than originally planned but it should be okay.
 Some judicious cutting and the splice is finished. Now I have to wire the turnouts and blocks and mount the terminal blacks so I can put up the fascia and make it look finished.

Saturday, May 10, 2014

Some finishing work - Volume 4

 Well, we are nearing the end of the benchwork before we jump past a door so I am trying to get the fascia done to that point. We also have to incorporate a recessed control panel at Paxinos, so I have to put some framing in to reinforce the paneling there. You can see that I have added the splice panel reinforcing (the wood closest to us) and, looking to the left, the reinforcing for the right side of the control panel. The horizontal posts sticking out under the track reinforce the top edge of the paneling.
 Going back to Shamrock, you can see where we have added the horizontal reinforcers that match the vertical plane of the bench work. This is looking towards Paxinos. I am going to place a bridge over the track to provide a view block to separate the scenes.


 Moving up the track, all the braces are in but I have to set the roadway height for the bridge when I come through here with the paneling.
 Here is first piece of paneling cut to go in around that curve. You can see the bump up where the road will hit the paneling as the bridge crosses the track. I am gathering the clamps, etc, to set this piece in the glue I have placed on the bench work.
 The big problem going around a curve is that it requires a great many clamps to hold it close to our contours. So, we clamped the joint fully, using a ripped 2X4 to spread the pressure evenly. The glue is coming out nicely so I am happy.
 It is a bigger problem clamping these taller pieces so I had to come up with a different system but I did use a lot of spring clamps to hold the base. I shot some nails into the top where we had a horizontal reinforcer. You can see the rise in the paneling where the road will go over the tracks. It is just above the big blue clamp.
 Now you see the second piece that brought us to the splice backup that we placed earlier. I need to go back in and cut out the fascia for the panel.
 So, this is Paxinos with fascia.
 This is the curve from Shamrock with fascia
And this is the line up the hill to Paxinos. You can clearly see the rise in the fascia for the farmers bridge over the line. The next installment will detail the installation of the panel at Paxinos. Then we go onto Weigh Scales which starts along the back wall in the distance.

Sunday, March 2, 2014

Some finishing work - Vol 3


 Well, we have a lot of low bench work where the base is even with the top of the chord. So, this goes a lot faster as I do not have to shape the top side or coat the back as it is solidly against the wood. This is at the start of the Northumberland yard area.
 We do have some tight corners to cover and I have a sheet of masonite resting on the bench work to enable me to see how far it will go.
 It goes up pretty fast but again is limited by the time it takes the glue to dry. I have to come up with a way to cover the joint with some sort of body putty.
 This gives you a view of how this is going on. I am maintaining about a 1/8" lip above the yard surface to allow for ballast and cinders. I will have to be careful when climbing on the top to avoid crushing this.
 It takes a lot of clamps to ensure that the fascia stays tight to the curves when making a corner.
Here is a view down the aisle with fascia now on both sides. I have to develop a color for this that will not attract the eye. I am thinking of a flat dark smoke grey to be slightly darker but similar to the color of the legs. By the time you read this I have traveled another 50 feet along the bench work.

Some finishing work - Vol 2

 Well, as we got into the project, we had to develop some new techniques to help keep everything plumb and to avoid sheets climbing or falling over the distance we are traveling. Here we clamped a level to help ensure the backers are vertical to the lower member. You can see the 2X2 is up against the level to hold the masonite in place.
 Another view of that process. We spaced the 2X2's at about 16 inches to give good support to the flexible masonite.
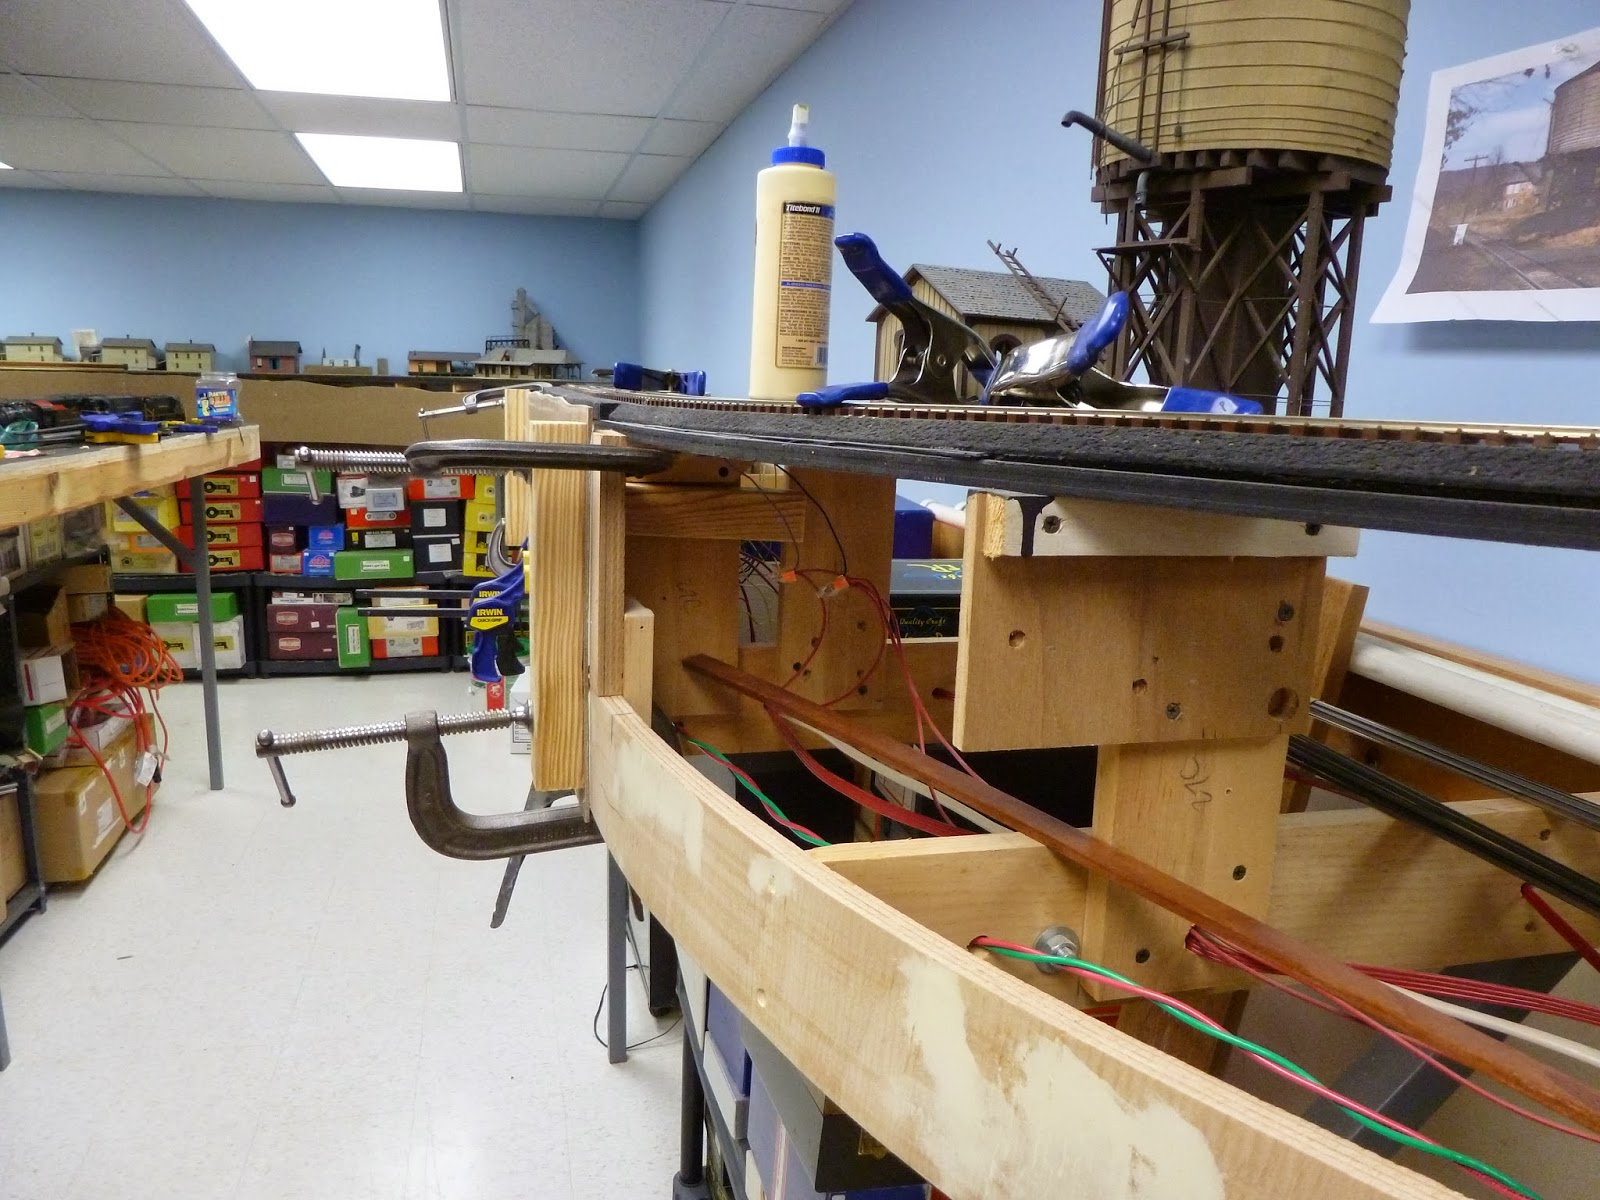
 Here is the next sheet in place and clamped to hold it while the glue sets. It takes a lot of clamps as the masonite wants to straight from point to point. I have it keep it clamped for about 5 hours. So, I can only go so far as I have clamps to cover.
 Here is a view from above showing the reinforcers holding the masonite in place. I cut the reinforcer's ends to match the curve.
 Here is our next seam point. I use the nail gun to expedite to joint of the seam backer to the lower chord of the benchwork
 This is an after view as we move along the branch. You can see a deeper cut in the profile where we have a culvert under the track
 This is a view of the next piece, including the joint with the existing sheet.
This is where we stop for now as I have to incorporate a panel for the junction at Crowl. So, we covered about 30 feet in about 3 days.

Some finishing type work. - Vol 1

Well, I am getting tired of looking at wires hanging down on the higher sections of the layout. So, since I have finished the wiring of Reed, I decided to begin hanging some 1/8 inch Masonite to cover the view and allow the start of some scenery work. This is how it looks at the start. The control panel for Reed is built and hung.
Then we come through the curve leading to Crowl. I purchase a large order of Masonite and had my son in laws and Justin help me cut quite a few sheets to size over Christmas for me to work with. Then I coated the back with a shellac type sealer to prevent movement.  
 I thought it would be an easy issue of just putting up the masonite but Ed Rappe, Paul Cieurzo and Jack Brown quickly disabused me of that notion on a Monday night when I was hosting our weekly meeting. There is a lot of substructure I have to place to make it strong enough to resist people pressing against it. That includes wood backs at seams as well.
 Here we are temporarily setting  a piece to locate the wood seam backer. You can see the white from the sealer on the rear of the sheet. We also leveled the sheet on the bottom to make sure it met the panel without a big gap.
 This shows that we placed some reinforcers behind the sheet leading to the roadbed to hold it out off the scenery when it is covered.
Here it is where it meets the panel. Things look good so I can go ahead and place it using some Liquid Nails adhesive. I plan to use that primarily to minimize the spackling I have to do to hid any holes. This took quite a lot of time to start.

Saturday, December 21, 2013

Building Paxinos

 Well, I am continuing along the branch line heading for Weigh Scales and the next town is Paxinos. Here is how we left it when we built the line through here some years ago. The station I have selected is the Magnison model. I also have a big furniture factory from the legendary John Young's layout. It was built by Ben Brown. It looks quite impressive up here along the branch.
 I have also included a Berkshire Models freight house to round out the scene. The line is rising up the hill so as I will not be able to leave any freight cars on the main track, this town will be switched from Weigh Scales. I am trying to get a good position for the models before I build the tracks.
 This is looking back west towards Reed around the corner. I am trying to place the sidings so I can squeeze the station between them and the main track.
 It is beginning to look too close but I will move the rear turnout back to give me the best shot.
 This area, where the boxes are is where I will place another factory or industry. I have to do something to hide that wall space - maybe a brick wall of the factory.
 The panel will go here after I get the track work done. I will have to move some supports to fit in the switch machines.
 Okay, we are now building the first turnout that switches back to the area where I will put the factory behind my right shoulder.
 I have laid the track along the furniture factory to see the clearances I need for the cars.
 This is the layout that seems to work best. The station is beyond the siding and we have a crossing shanty to protect the people going to the platform for the passenger cars. The turnout to the freight house is in the middle of the freight platform at the factory but that will just add to the switching interest.the factory siding will hold about 4 cars, the freight house about 3.
 This is a view back around where the next industry will go. The track off to Weigh Scales is the one to the right going over the bridge.
 Another view showing the crossover that I built.
This is a closer view of the factory and the freight house layout. I have to trim the ties in the turnout area. I think it has a nice feel that will be enhanced when I add some trees and a road. I plan for a team track area for that open space in the Vee between the factory and the freight  house track.