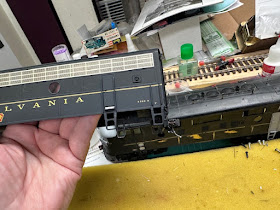
Well, we are in the home stretch with the B unit. I have sprayed the body with Dullcoat to blend the new paint with the old. It has come out pretty good . This side is the one with the damaged panel that we painted and decaled. The next project, and the more difficult one, is lying behind the B unit - the A unit.
This is the other side. I also opened up the lens on the back up light so that the bulb will shine through.
I am pleased with the results but probably will weather the unit to further bland the colors.
Some closer views. I have prepared the chassis, as you saw previously, and installed the lighting module.
A closer view
Last shot.
Ah, now the A unit. This took the brunt of the blow when it hit the floor and damaged the nose plus sprung the rear and crushed the antennae.
On eside has no lettering left from the body work by the craftsman, Mike Mangini, who did the body work.
I am thinking I can salvage the antenna if I can do some very careful soldering on the posts. The paint on the roof is very heavy so I cannot easily get down to the brass to unsolder everything. This is driving me to the careful soldering approach. I tried to buff f the paint but could hardly scrape it. In fact, I buffed the whole area to remove the overspray of the primer from Mike.
The roof shows that I have removed the shine but not much else.
This side has had the lettering essentially removed due to the work.
The other side has most of the lettering still in place. I do not yet know if I can use it. Perhaps just the road name.
I also buffed off the overspray on this side. I will have to rebuild the nose headlight as the internals have all been removed to allow the contours to be rebuilt.


No comments:
Post a Comment