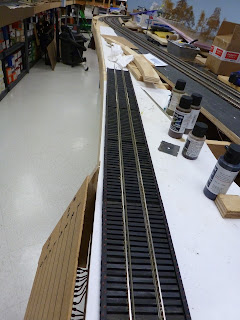
The next step on building the bridges was to complete the deck - track, guard rails, and guard timbers. Well, when the railroads added wood guard timbers, they lag bolted them to the cross ties. So, we have to also. This means drilling hundreds of holes and adding castings to simulate them.
So, here we are drilling our holes and adding the castings. I quickly realized I had to paint them before putting them in. The grey is the plastic color.
Here are my castings after removal from the sprue
Here is my set up - strong coffee is essential. I originally thought I should use a straight edge to keep the bolts in a standard staggered pattern but that soon proved impractical. I could stagger them by eye. I needed the curved tweezers to hold each bolt and place it into the drilled hole before I drove it home.
Looking back on progress. The two bolts close together at in the ends of adjacent timbers.
So, now I painted those bolts a rusty color. I had to place about 700 bolts. My eyes crossed as I thought about it!
Now the painted bolts are going in. After a couple of long afternoons, we were done.
Next is the guard rail, which I learned I had to paint before placing them on the ties. I had code 125 running rails so I used code 100 for the guard rails. That way I can clean the track and not affect the rusty color of the guard rails. Plus, it was prototypical to have lighter guard rails. My rail section was 6 feet long - I have obtained those lengths from Trackside and I find them better than 3 foot lengths, particularly for laying curves. So, I did not need joiners on the bridge which is 56 inches long.
Okay, guard rail number one is in. I used the NMRA gauge to space the rails and only spiced every fourth tie.
Guard rail number two in and openings bent to gather derailed wheels. I will place the joiners about 3 inches before the entrance to the bridge to minimize height variation problems.
Completed deck. Now I have to build the deck girder to carry the last 16 inches of the bridge.


No comments:
Post a Comment