Saturday, October 29, 2022

Completing the Track Work into Shamokin

Well, the track plan has been decided on and now I am gluing the switch ties down to allow the passing siding from the main to the factory to be installed. We have the ties glued and weights on them to fix them in place. 
Glue is dried and the tops of the ties have been sanded. 
A look down the track to see where we have to connect to the trackwork back by the factory.
The first turnout is now built and the second is under construction. This is a little tricky as the turnouts are on a surface where the grade is ending and then flattening out. Also, I am standing on two stools and my head is pressed into the ceiling.
The second turnout is just about done, and I realize I have to extend the wooden ties by at least a couple to provide space for the ties of the diverging tracks to be placed. 
Now the track beyond the turnouts has been placed. You can see there are a lot of sweeping curves involved in smoothly blending into the tail tracks. The left most track is a future siding for a building flat that will be placed along the wall. 
An overview of the whole junction


 A distance shot of the town of Shamokin, less a few structures. Now, on to the wiring.

Modifying a tool

When trying to make the headlight lens for the RS 1, which is 1/4 inch in diameter, I found that the leather punch I was going to use put a big dent into the clear plastic as it had a sharp point on the male member.  So, I figured I could make a brass collar to surround the point and make the head of the punch appear flat. Using brass rod, I turned it to the required diameter, then drilled the center out to allow for the point. The whole assembly is here.
Then I glued to adapter to the punch using canopy glue so it would be easily removed, should I need the punch to be usable for heavier material. The punch is resting on the female member of the tool. 

 Here, you can see the punch point in the interior of the spacer. When I used it, it worked perfectly but the glue could not hold the spacer when the punch was withdrawn from the material. Not a problem as it was easily re-secured, and a second lens made. 

Monday, October 10, 2022

Finishing the RS1

Previously, I had added canvas shades to a GP9. The Alco RS1 also had canvas shades so I had to do another engine. You have seen earlier photos as I painted the engine. Here I have taken my cigarette paper and twirled it on a wire mandrel and test fit it to the cab.
The wire is 0.020 and painted black as we start. Then I glue the paper to itself and the mandrel. I use the glue on the paper to make cigarettes. 
Here is my brand of choice but any brand will work just fine. 
The cab shade mandrel has been fixed to the cab side by using canopy glue inside the cab. Next, I set the length of the shade and made a base using 0.030 wide styrene strips, painted them black and secured them and paper to the cab above the windows. I then colored the paper with Poly Scale aged concrete. 
Here is the engine now reassembled and ready for a little more weathering. 
The fireman is distracting the engineer telling him he likes the shades. He can thank Lee Turner for showing me how to do this.
Almost finished product. This is a Car Works model with a new drive using NWSL wheels and a Des Plaines tower. I really like the looks of it.  A new branch line shifter. The engine number was from an engine assigned to the Northern Division. 
 

Reaching out for Shamokin - Part 1

We have to add some ground to allow the tracks to reach from the branch line turnout back to the factory and team track. If you look at the lower center, you can see the Homasote patch to add the necessary base.
This is an overview of the additional base. Ed and Paul worked hard to get the sub-bracing in on a recent train night. They then cut the Homasote to match the hole they were filling. My job was then to level everything up and finish the installation.
This is where we diverge from the branch main and head back to the plant. The patch was necessary to allow me to add another two turnouts to form a passing siding and a switch to another plant that will be on the wall. 
The patch is set and now has been painted to match the rest of the cinder base.
An overview of the completed patch
The two turnouts have been located using the diagrams. They will be two Number 6 right hand turnouts in a row. I had to move the furthest one towards the rear as I had to deal with bracing underneath. 

 An overview of the prospective installation. 

Wednesday, September 14, 2022

Finishing the Shamokin Turnout Track Complex

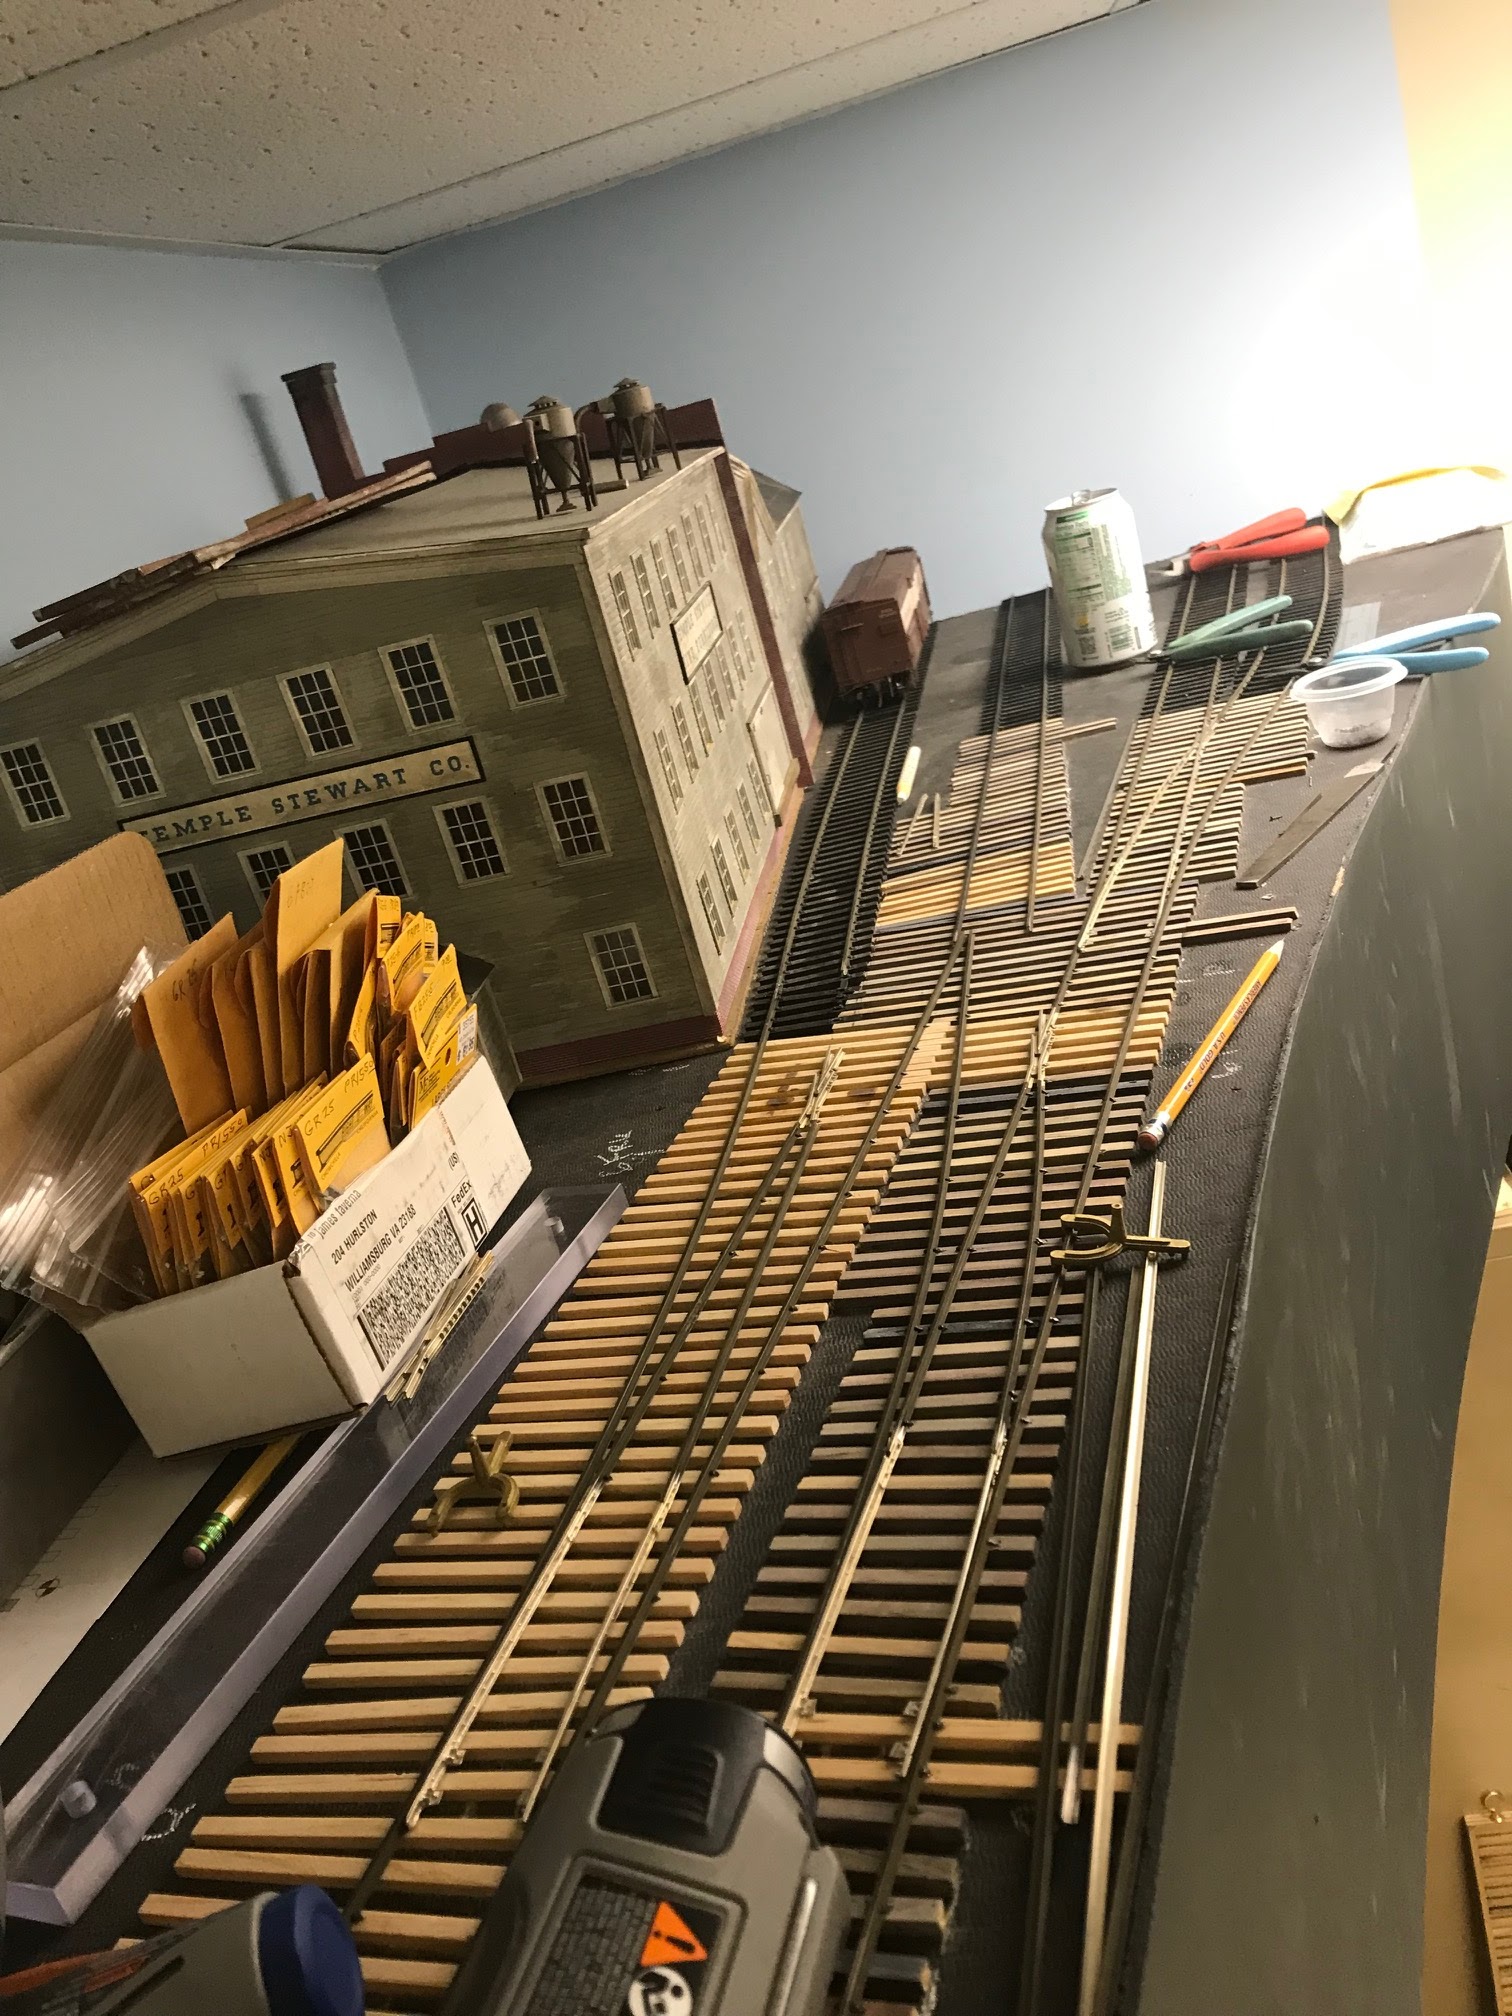
Okay, the ties are sanded, and I have assembled my supply of points and frogs next to the factory. That factory is a bit of a problem as it has a fire wall in the middle of the long wall that juts out and that is putting a little pressure on my first turnout placement. I have to have the track a little further from the wall than I figured initially. I am beginning to place my components and test for fits. 
The turnouts have to fit pretty close to plan as they flow from one directly into another and they are all co-dependent. You can also see my white pencil as I have been checking my frog locations. I found I had to shift to a No 7 frog on the last one to make it all come together. The team track, which are the last two tracks to the right of the soda can, has the No 5 turnout as it is in a short space. 
I am beginning to lay the turnouts. I use those Kemtron tack gauges as they allow you to spike around them., 
We are getting closer as the two leading turnouts are in. The points are not connected but they are tested with the truck that is in the foreground. It runs smoothly through them. I have gotten the track in next to the building with enough clearance for an engine. 
Okay, now all the turnouts are laid, and I have placed some pewter based guard rails at each frog. Everything runs smoothly and I now have to install the motors. 

Motor linkages are sticking out of the point bars, and I now have to cut the spring wire to length

Here is a high level view of the installation. I am beginning to cut the ties to length. 
This is a close up of the point bar with the spring wire before trimming. I also cut the brass studs that the points are bolted to. 
This is a completed turnout. Brass studs cut down, spring wire cut and a closer view of the pewter guard rails. These were made by Harry Roberts some years ago. I used up the last of what I had on this installation. 
 Next, we have to install the wiring to the track and the frog and then paint the track. Another week to go. 

Building into Shamokin

Looking up towards the end of the benchwork, I need to develop a way to bring in a local freight and allow the engine to run around its train. The engine will then switch in Shamokin and also can switch the coal mine at the other end. This will require a long passing siding that terminates in a turnout complex. 
This is completed track work back towards the mine. The branch is coming up the hill on the left and the mine tracks come off at the curve.  
As we come around the curve leading to the bridge, the Shamokin track branches off to the left and moves towards the rear wall. 
I plan to place this big furniture factory in the rear corner. I am laying out turnout diagrams to see how I can create that run around track, a siding for the factory and a two track team track on the right. I find I need at least 23 inches from the end of the last set of points to the wall to allow an I1 with a short tender to clear them. 
Based on that planning, I laid out the locations of the 4 sets of point bars that I will need for the complex. I used that large drill to drill the holes for the switch motor linkages and begin to lay the ties. 

 I continue to check and recheck the positioning and use three different numbered frogs to make it all work. There are two No 6, one No 5 and one No 7. Those diagrams are very helpful in this and fortunately, available on the internet. I have painted the Homasote black as a sub-base for the ballast. It allows me to use a white pencil to notate where the points, and frogs will be placed. 

I will proceed to lay all the ties and let the glue dry for a couple of days. Then I will sand them all. 

Continuing trackwork in Glenburnie

Well, we finished the turnouts in Glenburnie and now we have to put in the sidings. I take older issue Atlas track and remove the large sized rail. This leaves me with many one foot long sections of the plastic tie strip. I sort through what I have salvaged and select what I want to use for the sidings. 
Gathering up my track tools which include a beefy Dremel with a cutoff disc, I get organized. I am going to use pre-weathered Rail Craft Code 125 Nickel Silver rail in three foot sections. The rail sections are laying on the handles of the red pliers. 
I slide this rail into the clamps on the tie strip which holds in very nicely. This rail is a match for the casting from Trackside Specialties so is perfect to build our turnouts and then use for our running rails. 
Here the pile is shifting towards completed three foot sections of track


Having made about 12 sections of track, I am laying the siding tracks using a gauge to ensure they stay nice and straight. I solder the joiners between the sections after I buff off the rail brown paint on the side of the rails. Then I added car stops at the end of the tracks. 

 Here is a long view with the sidings completed as I begin to scope out the tracks that will come into Shamokin. We can see there is about a two inch elevation increase between Glenburnie and Shamokin.