I have to terminate the ridge in a backdrop that will run behind the yard. I had purchased about 75 feet of 3 foot wide 1/8 inch thick styrene to try to minimize seams on that long run. When I went to straighten out a piece to use, it was very rigid as it has taken a set after being in a roll for some years.
So, I had to cut a 6 foot piece to manage it and place it at the beginning of the backdrop. To try to hold it down took multiple pieces of 3/4 inch plywood scraps that were screwed to the frame of the backdrop.
I used a Gorilla glue for tough projects that would not attack the styrene to hold it to the Masonite backer. Left to set for a couple of days, you can see where the webbing stopped while I got this done. In future, I may try to unroll some lengths and let them sit in the sun out back to get them to relax and go flatter because this is not going to work for the major coverage. I am also thinking of mixing in some 1/4 inch thick sheets of sheet rock for the straighter sections as I will not have enough material.
After removing the clamps, I sketched in the decline of the hill side as it becomes just a mound of trees behind the track. It will stay just above the styrene seam.
Here we now have the webbing along that hill side . The slope is more vertical than I would like but I am without options in that regard. So, I will use some rock molds low and then trees along the top.
Here is a view back along the whole ridge. The slope is gentler as you go back so it will be more treed in that section. I have to develop a method for bringing the bridge over the aisle so I can finish the slope down that end.
This is looking back from the area of the bridge. Now for the rosin paper and then the plaster cloth. Always plenty to do! I have run out of glue sticks so have to get several bags of those for the next steps.
Tuesday, August 11, 2015
Finishing Genevieve's Caboose
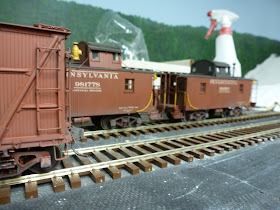
Well, in an earlier post you saw my granddaughter holding her teddy bear and painting weathering on a caboose. I thought I would show you the finished product. It is the car to the left - an NX23 caboose. It came out so well, I also did two N6b cabooses.
Here is a broad side of the car with the safety yellow on the railings and glazed. I shot is with some grime from below and grunge from the top down.
It looks good on the siding. The trucks were oiled up and as shown below, mud was sprayed up on th ends from the rain.
Here is the view from the roof. In future, I will do some board coloring on the roof walk as well.
I also used the technique on an SP 50 foot boxcar - an A50-10.
I am really coming to like the look.


